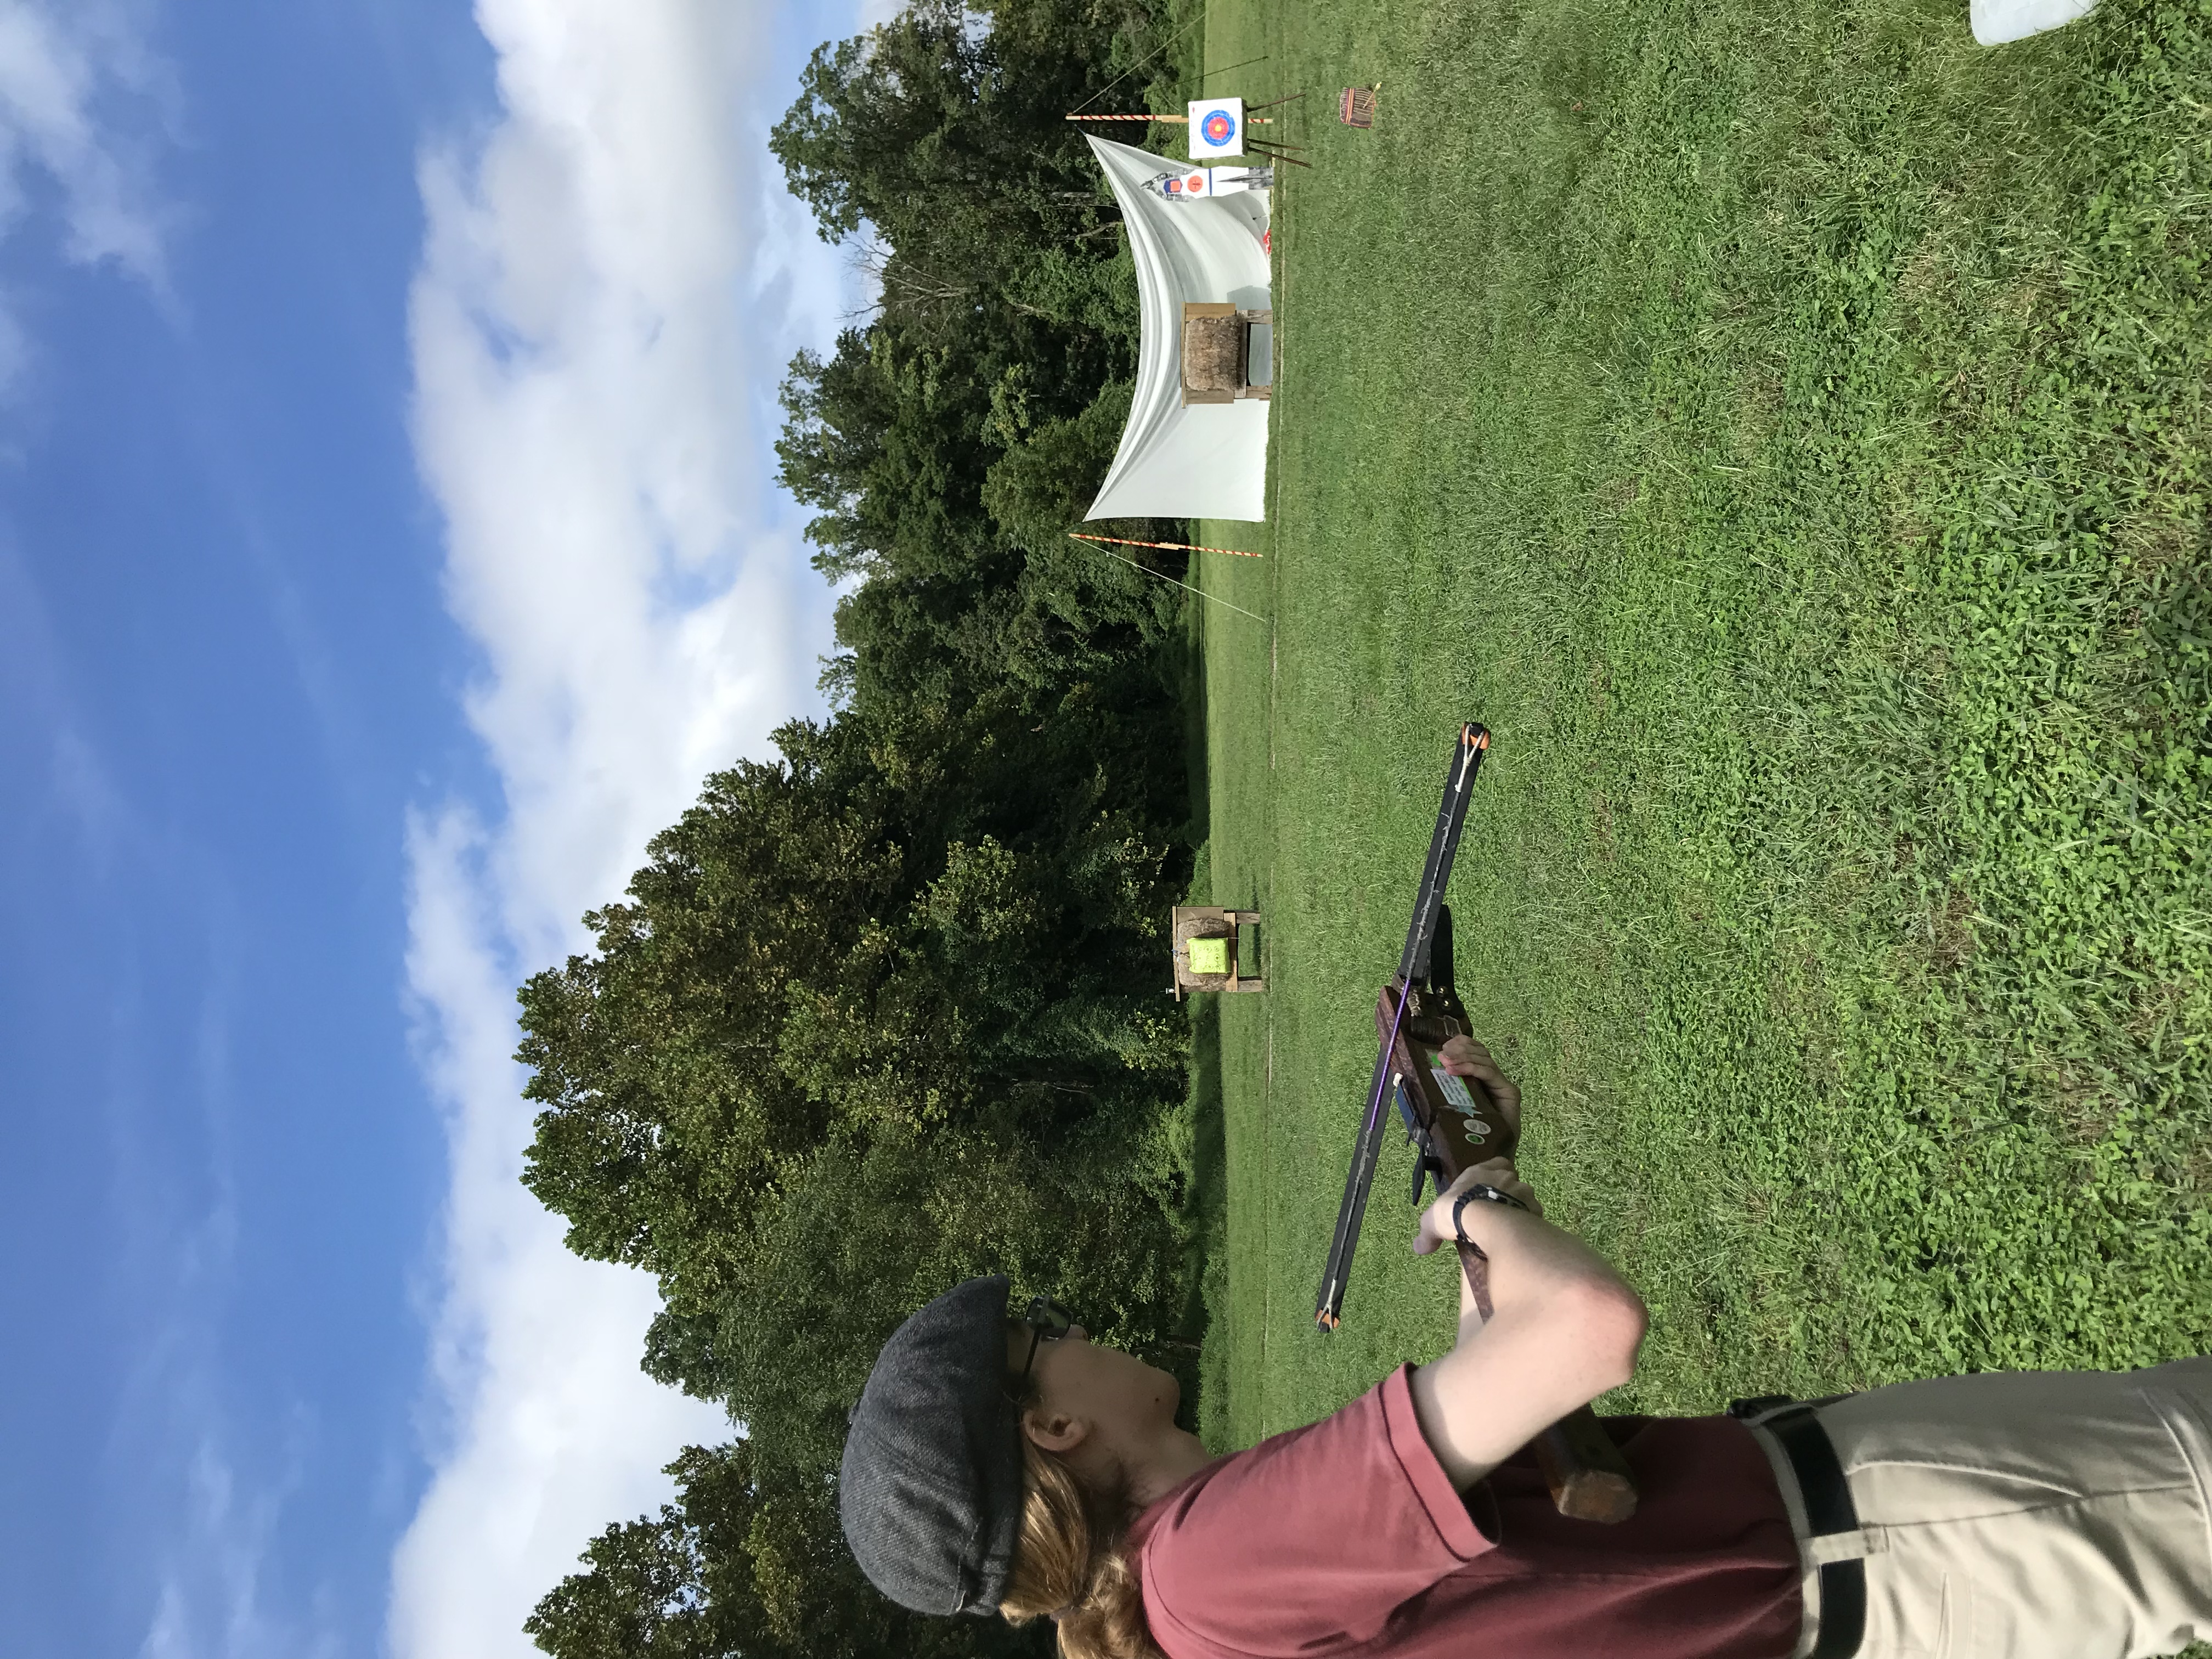
Had a good time at practice today. Got to shoot some combat equipment and share the fun. Met new people too!
 Movie: Shooting at a current IKCAC target
Movie: IKCAC target 2
Had a good time at practice today. Got to shoot some combat equipment and share the fun. Met new people too!
Movie: Shooting at a current IKCAC target
Movie: IKCAC target 2
A question that gets asked a lot: What gauntlets can I use for Combat Archery?
According to SCA Martial Law (XVIV. GLOSSARY. A), demi-gauntlets fit the bill. This is the minimum requirement, but as always check your Kingdom Marshal Law regarding same.
But is that what you really need? Depending on how active you plan to be in combat, it may be the perfect fit. However you may find that killing people on the field is so much fun, you need to invest in more diverse ways of dealing out death blows (spear, sword, etc).
If the latter seems your case then you may want to consider investing in good, articulated ‘full’ gauntlets. I suggest articulated because it will afford the dexterity you will need to handle Combat Archery equipment effectively and safely, yet allow you to switch the ‘heavy’ weapons as well.
It is true that most fighters try not to club Combat Archers like baby seals, but it can happen. When it comes to protection, wear the best and most padded you can without trading (too much) performance for protection. You can augment purchased gauntlets with additional layers of closed cell foam if needed. Get some industrial rubber cement, trim the foam, and slap it on! You can still get hit in the hand. Remember Combat Archers, always assume you will get hit!
It is true that ‘full’ gauntlets will run more. ‘Demis’ can be made very easily with leather and rivets with varying levels of quality. These look like a good standard well made demi set. You can even find patterns and instructions. Here is an example of articulated gauntlets. These will certainly be more expensive, but may be the last pair you ever buy.
For the cost of entry though, demis are generally very affordable. Dont spend too much time on the issue if you can afford a pair. If you find later you need to change up, you can. But it is always worth considering options as soon as possible. We all aren’t made of money you know!
Happy Fighting!
I came across the timers page on the scores site, and thought it was nice how someone recorded themselves timing out various lengths of time.
 So as a fun project, I decided to edit some of the audio (which Ill likely re-record and clean up) and create a simple web application that is easy to use. The page is responsive so should work on any modern browser or mobile device.
So as a first attempt I’d love to get some feedback from you all!
Take a look at the timer. Please comment on this article with suggestions and comments. Perhaps I can refine the concept further.
Cheers all!
Greeting friends!
When it comes to making target backs, it can get complicated real fast, and there is a lot of good advice to be gleaned.
One quick and dirty way Ive discovered and worked on and it is dead simple to create, and deploy.
Use the pink insulation board you can get at any home improvement store. Cardboard you can get anywhere but you can also purchase these. The pink boards come in various shapes and sizes, so depending on your target size, you can get what you need. you can use a pocket knife to cut the boards. I don’t recommend trying to use the ‘score-and-break’ method you might use on drywall.
I like to get my targets printed out at the local print shop (Minuteman Press). They can print on thicker paper stock up to fairly large sizes, but the most cost effective are 11×17, and they usually refer to it as ‘card stock’.
Next you will need some adhesive. I recommend 3M Super 77 Spray Adhesive.
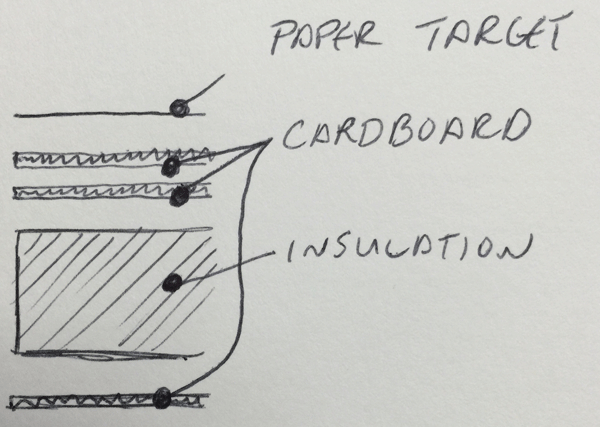 Like ogres, these targets have layers. Sandwich the cardboard and the insulation using the adhesive. Spray the adhesive on both faces, wait 45 seconds, then laminate them (press together). I usually try to have two layers of cardboard on the side that gets penetrated. You can then apply the thick stock paper printed target on top.
Assembly can go pretty fast. Make sure you are in a well ventilated area. Use gloves if you can, because this stuff is pretty nasty if you get it on your hands. That said, I don’t usually use gloves, I’m just careful.
These targets will stand up for years of regular use, and the cardboard laminate helps keep them together. Especially in cold environments where the insulation may be more brittle.
When you have new faces printed up, you can spray a little adhesive, and reapply right over the top. Add a new layer of cardboard to keep the face fresh, or strip off the old and re-apply the new. In this way the targets become more modular.
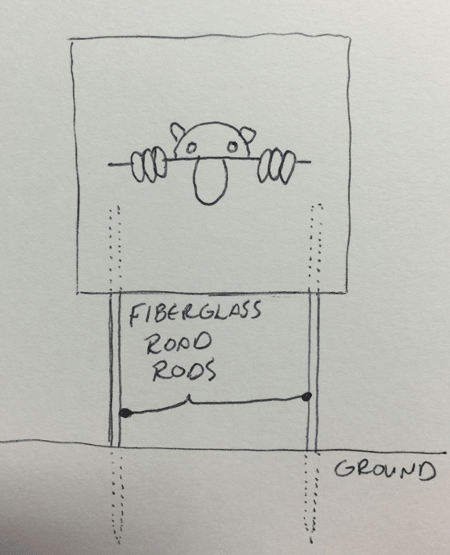 How do we stand them up? In the area where you find mailboxes and ‘For Sale’ signs, you can find Fiberglass Rods
. You can easily cut them down to usable sizes. for smaller 6×6″ targets, you will only need 8-12″ rods, for something like 2×2′ I would use two full length rods. The most important thing is to always erect targets with a pair of rods. This prevents spinning and helps keep the target in place. I try to work in thirds: On third in target, one showing, one in ground. OR you can press the target all the way down so it ‘sits’ on the ground, this method offers more stability, less ‘wobble’. You can usually force the rod into the insulation without much resistance.
Try to make sure you are parallel so the rod doesn’t protrude out the front or back. This will create a weak point that will shorten the life of the target.
There are other methods of quick and dirty backing, like plastic bags gull of plastic bags, spray foam, but perhaps we can go into that later!
Caveat for using these kinds of targets: Some ammo on entry, will heat this plastic up, and melt to the shaft. You can literally peel it off, but be aware. The more cardboard you use, I find, the more it mitigates this issue. YMMV but my crossbow is #76 and my recurve is #44. Don’t spray the adhesive too thick, you just need enough for adhesion. Too much and it will ‘gunk’ up your shafts as well.