Step by step embroidered badge
Its time to officially recover from Pennsic. But while the memories are still fresh in your mind: remember the arrow that was missing a point? The leather strap that broke? The throwing dagger that didn’t have enough compression?
Let’s get together and have a lil’ A&S and repair night to address some issues! If its a nice night Ill light the forge up as well. Let me know if you have projects you’d like to bring.
Items to be repaired, materials to affect repairs, new projects, whatever.
Anvil, hammers, grommets, rivets, leather scraps, pickle barrel, jewelry making supplies, remnant cloth, stuff… just stuff… there will be some snacks and perhaps a pizza later if anyone is game.
Dancing and singing is NOT required, but a bonus.
Eighteen Nineteen Potomac Ave SE Washington DC 20003
Phone: two oh two three two one nine one oh two
Show up anytime between 5-11 p.m.
Recently talked someone through making some bolts and I thought it would be helpful to have some visual references with a step by step guide.
Lets assume you have the pieces all purchased.
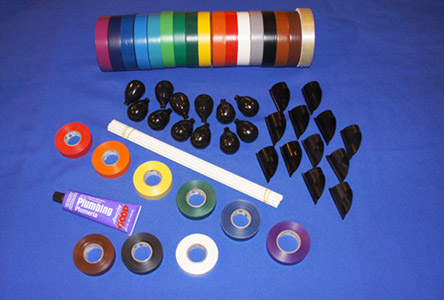
Got all your bits? Lets go!
Lets start with your shafts. Grab a blunt, you dont have to, but I like to smear just a touch of glue on the tip of the shaft. If you do this make sure to not over do it! Literally a smeared touch of glue. Place the blunt on the shaft and use the hammer to tap it down. You can flip the shaft and hammer the end of the rod but you may damage the rod and make it harder to seat the APD later. The blunt should seat 1 1/8″ down the shaft.
Once the blunt is securely in place, grab an APD. You should see a small pinhole on the APD near where the shaft goes in. This is where the excess glue can bleed out. Grab a pin and poke that hole to make sure it goes through and it clear of obstruction. This time, take a small pea-sized amount of blue and drip it in the APD hole. Insert the shaft in the APD. Now on the edge of a table or workbench, with the blunt on top and APD on bottom,
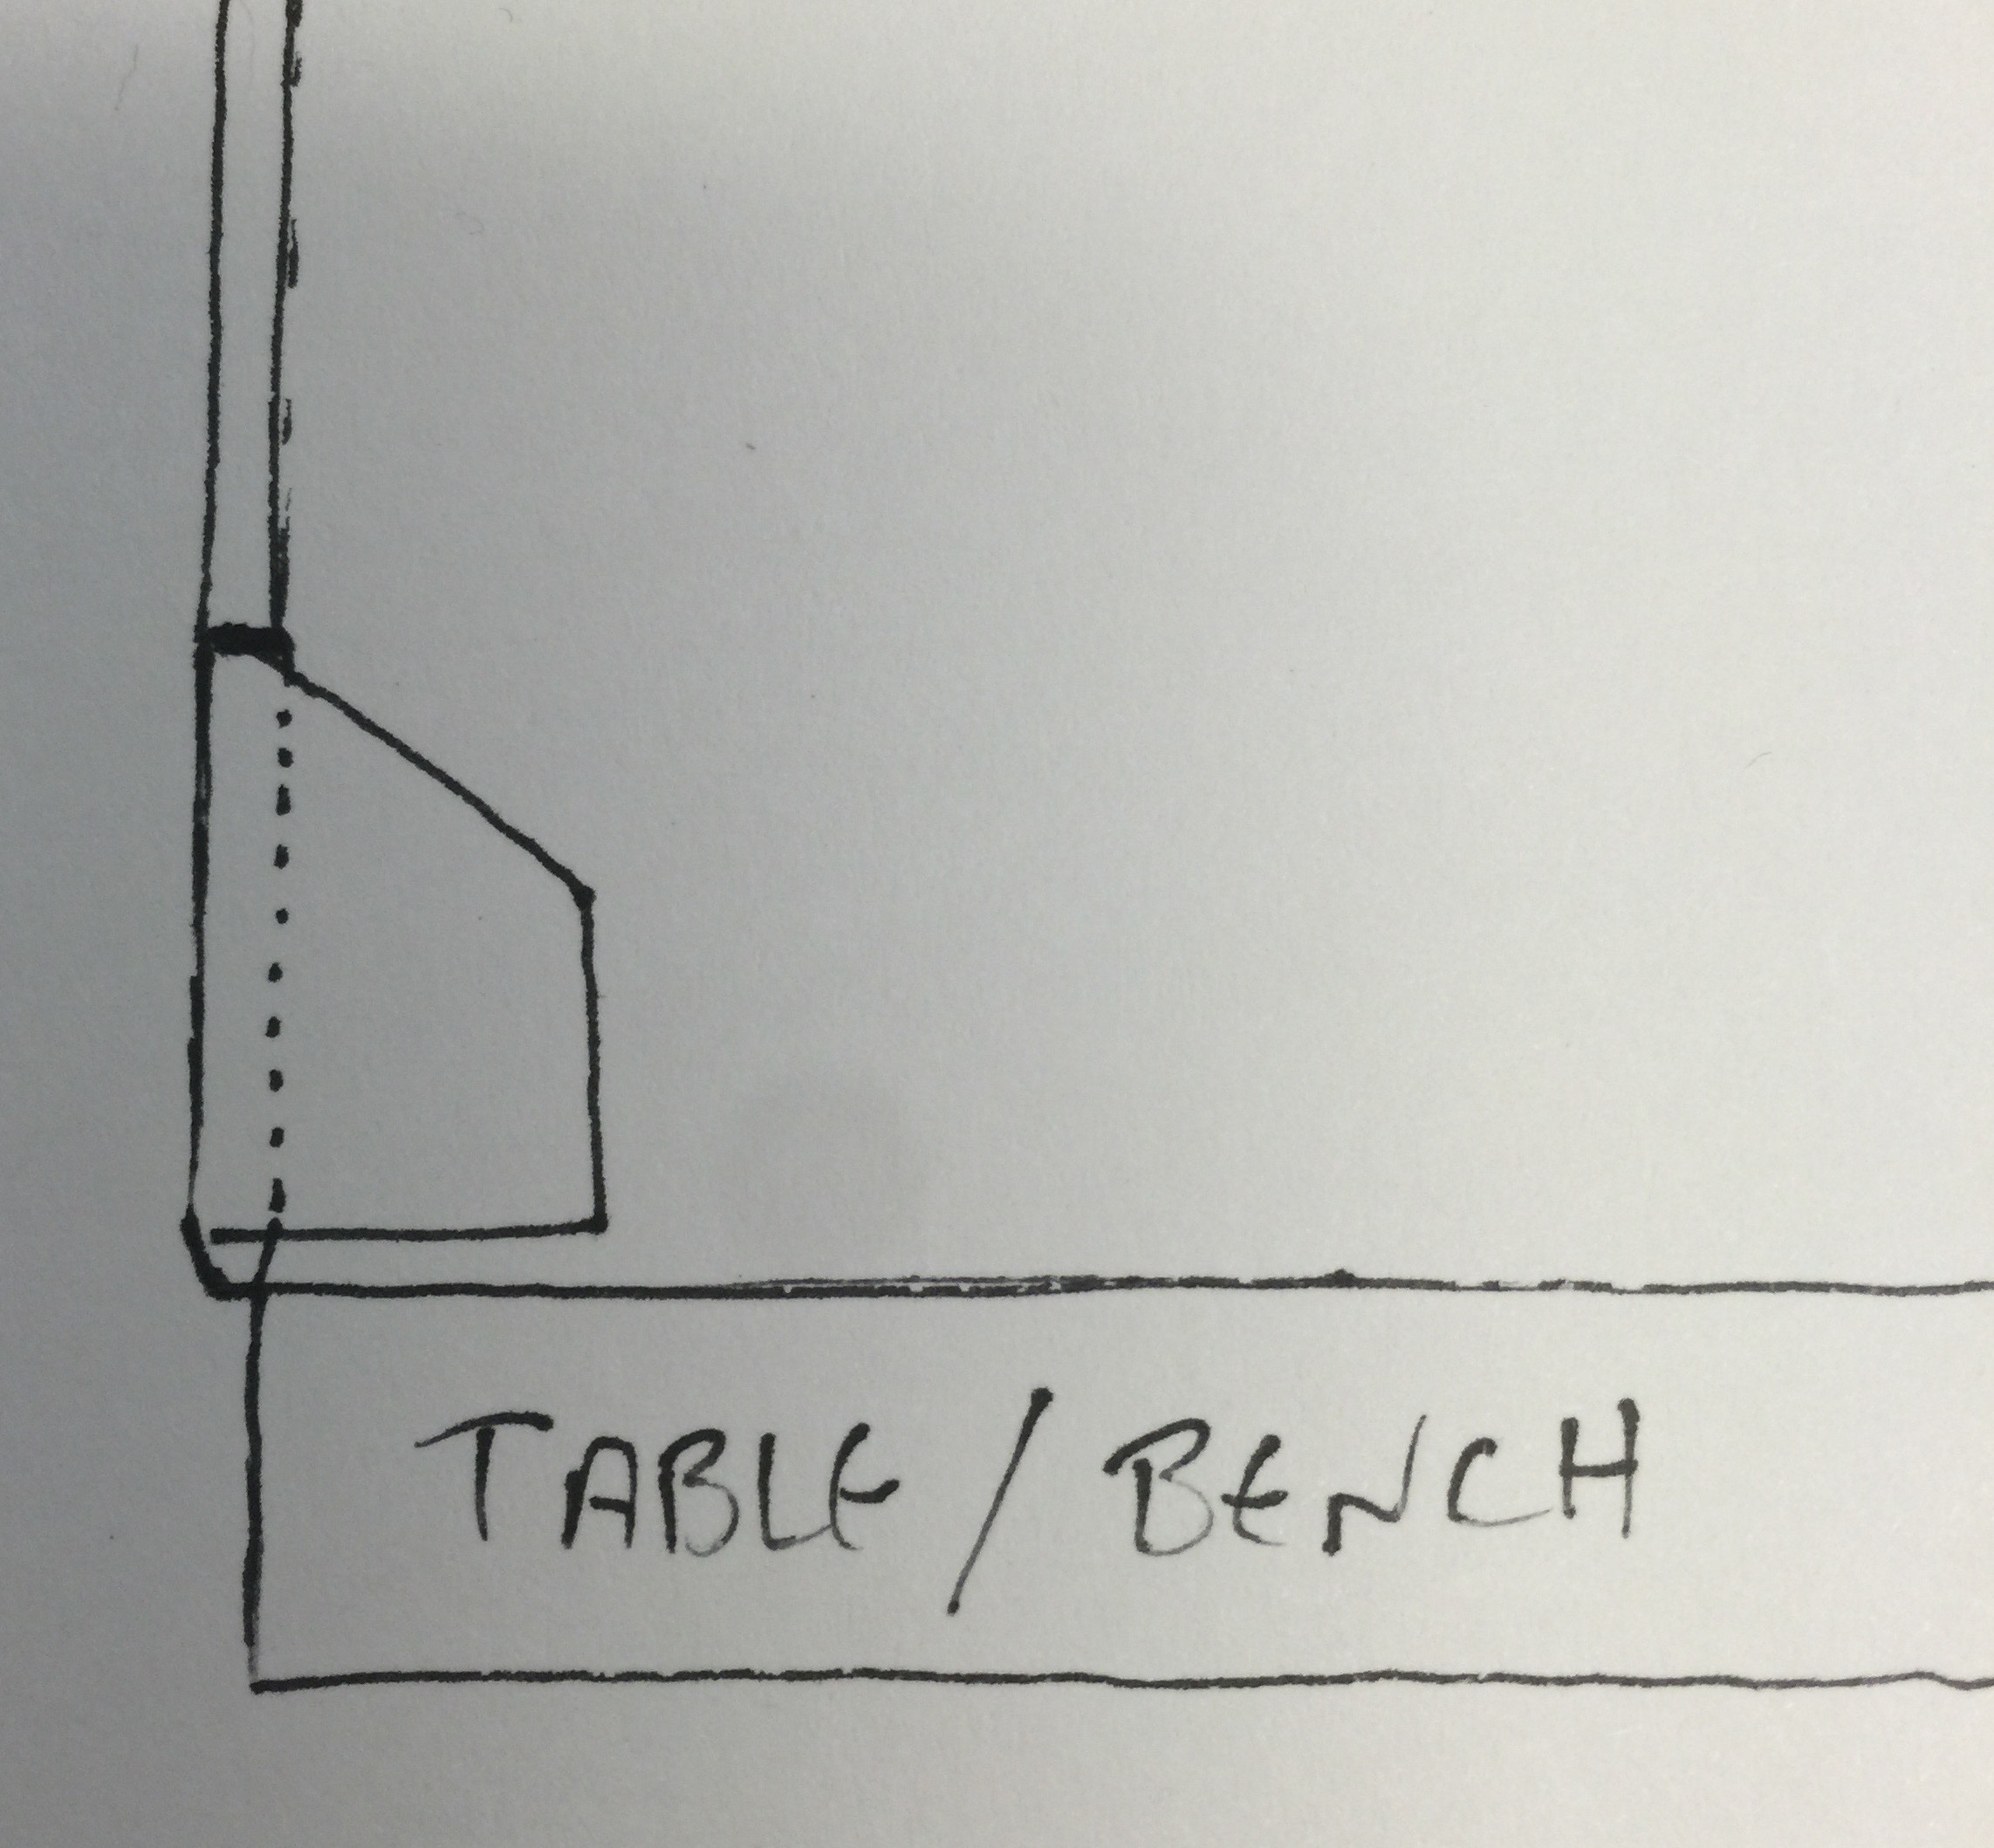
place the ring of the APD on the surface. The little nub at the bottom of the bold will be the only part hanging off. Hammer on the blunt to properly seat the APD. You may see a little glue squirt out the hole.
Next we will need the 1″ fiberglass tape. you want a piece that will go from end to end of the complete fiberglass shaft. This tape wraps around the shaft just. The whole shaft must be covered so that no fiberglass is showing.
Next comes the wrapping of the APD and Blunt. If you have 1/4″ tape, use this, otherwise you can split a strip of 1″ into 2-4 vertical strips. You may lose a piece or two in the process as well as cut a few too short. You will get the hang of it.

On the Blunt, make an ‘X’ and let the tape go down on the shaft at least an inch. For the APD, refer to Illus. 2 and make an ‘X’ from the shaft to the APD tip, then flip bolt over and go straight down the APD to the shaft. The APD tape isn’t a requirement, but its a good thing to do! This can be done with electrical tape, but using strap tape will last a LOT longer and is that much safer.
Now we need to have pretty bolts right? Here is where

the electrical tape comes in. You can at this point cover the blunt tape with colored electrical tape of choice to make it look nicer if you opted for strapping tape previously. Refer to Illus. 2 and note where the strap tape ends. Now we want to to start wrapping with electrical tape about a half inch above where the Blunt/APD ends, then wrap up/down until the strapping tape is covered. (Dont use too much gold tape! This is reserved!) Decorate to your content but remember the more tape, the thicker the bolt. Make sure the crossbow channel can handle it. Make sure you leave some space for…
Time for the label! I like to make a label in something like photoshop, but you can use Gimp, a label maker, whatever! Print out labels about 3/4″ x 1.5″. Make sure to include your SCA Name, Barony, Kingdom. Make sure its a legible font that can be read after being stepped on a few times. This covers all the bases. Now take your clear packing tape and go at least one and a half times around over the label.
Thats about it! Please post questions or comments in the comments below!
Next up, I’m all a quiver!
Additional Notes:
Bring extra tape and labels with you. You may get short on bolts and will need to do some last minute repairs.
If going to a war, I’d recommend at least 50 bolts because there may be a few battles before bolts get gleaned and re-inspected.
Ill shoot all my bolts at a board from about 20 yards. This is good target practice but also ensure the heads are seated.
Measure the shafts, if a few are longer, then the APD or Blunt may not be seated all the way!
Resources:
Your version may vary due to Kingdom law, please check yours before making any purchases or assembling. But as of time of writing, these are legal for Pennsic and most Kingdoms
There you are on the front line and you hear a [KA-CHUNK] right by your ear hole. What you didn’t know is that there is an archer right above your shoulder taking opponents out.

Communication is key for several reasons. After a recent event where we ran through exercises and discussed tactics, one thing was very clearly important: communication.
This can be as simple as alerting the line you are advancing up. The trifecta of death IMO is 1,2,3 (1 being the front): Shield (sword and board), Polearm, and Archer. But in this case the Polearm and Archer can be interchangeable. Lets go with the One-Two punch. Shield and Archer.
As you advance to the line let your shield/line know you’re there. They have one job and that is to stay alive, but if they know you’re there they can try to keep you alive as well. Deflecting opponent archers and poles.
Additionally if there happens to be an opponent on the line that is particularly hard to deal with, such as a Knight, Commander, or Crown, they can call out, and thereby give you leave to take them out.
A big part of teamwork is knowing what assets are in play and how to best utilize them. If your team knows an archer is there to help it can make their job easier. Just as when a shield dies, and ‘fill in!’ is called.
We all have our jobs: communicate effectively, and thereby win.