Step by step I’m making improvements to my camp life. There are two main reasons: To give me joy in my space, and to help immerse others in theirs.
Not much to say here, but I’ll provide some tips and info on the process.
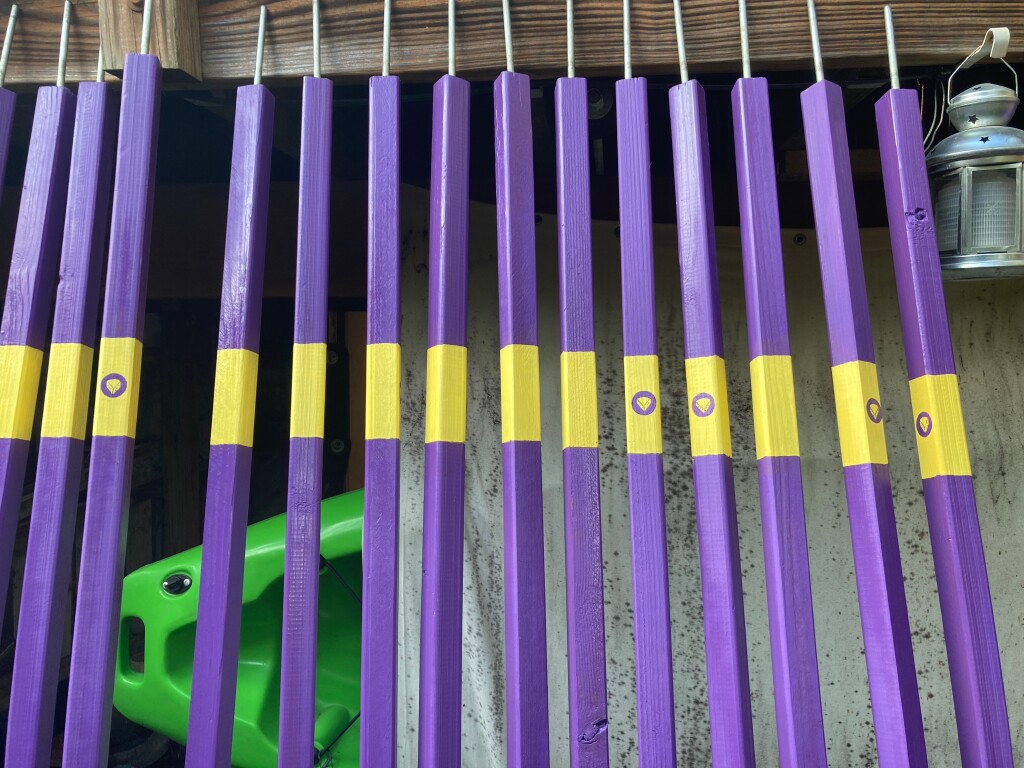
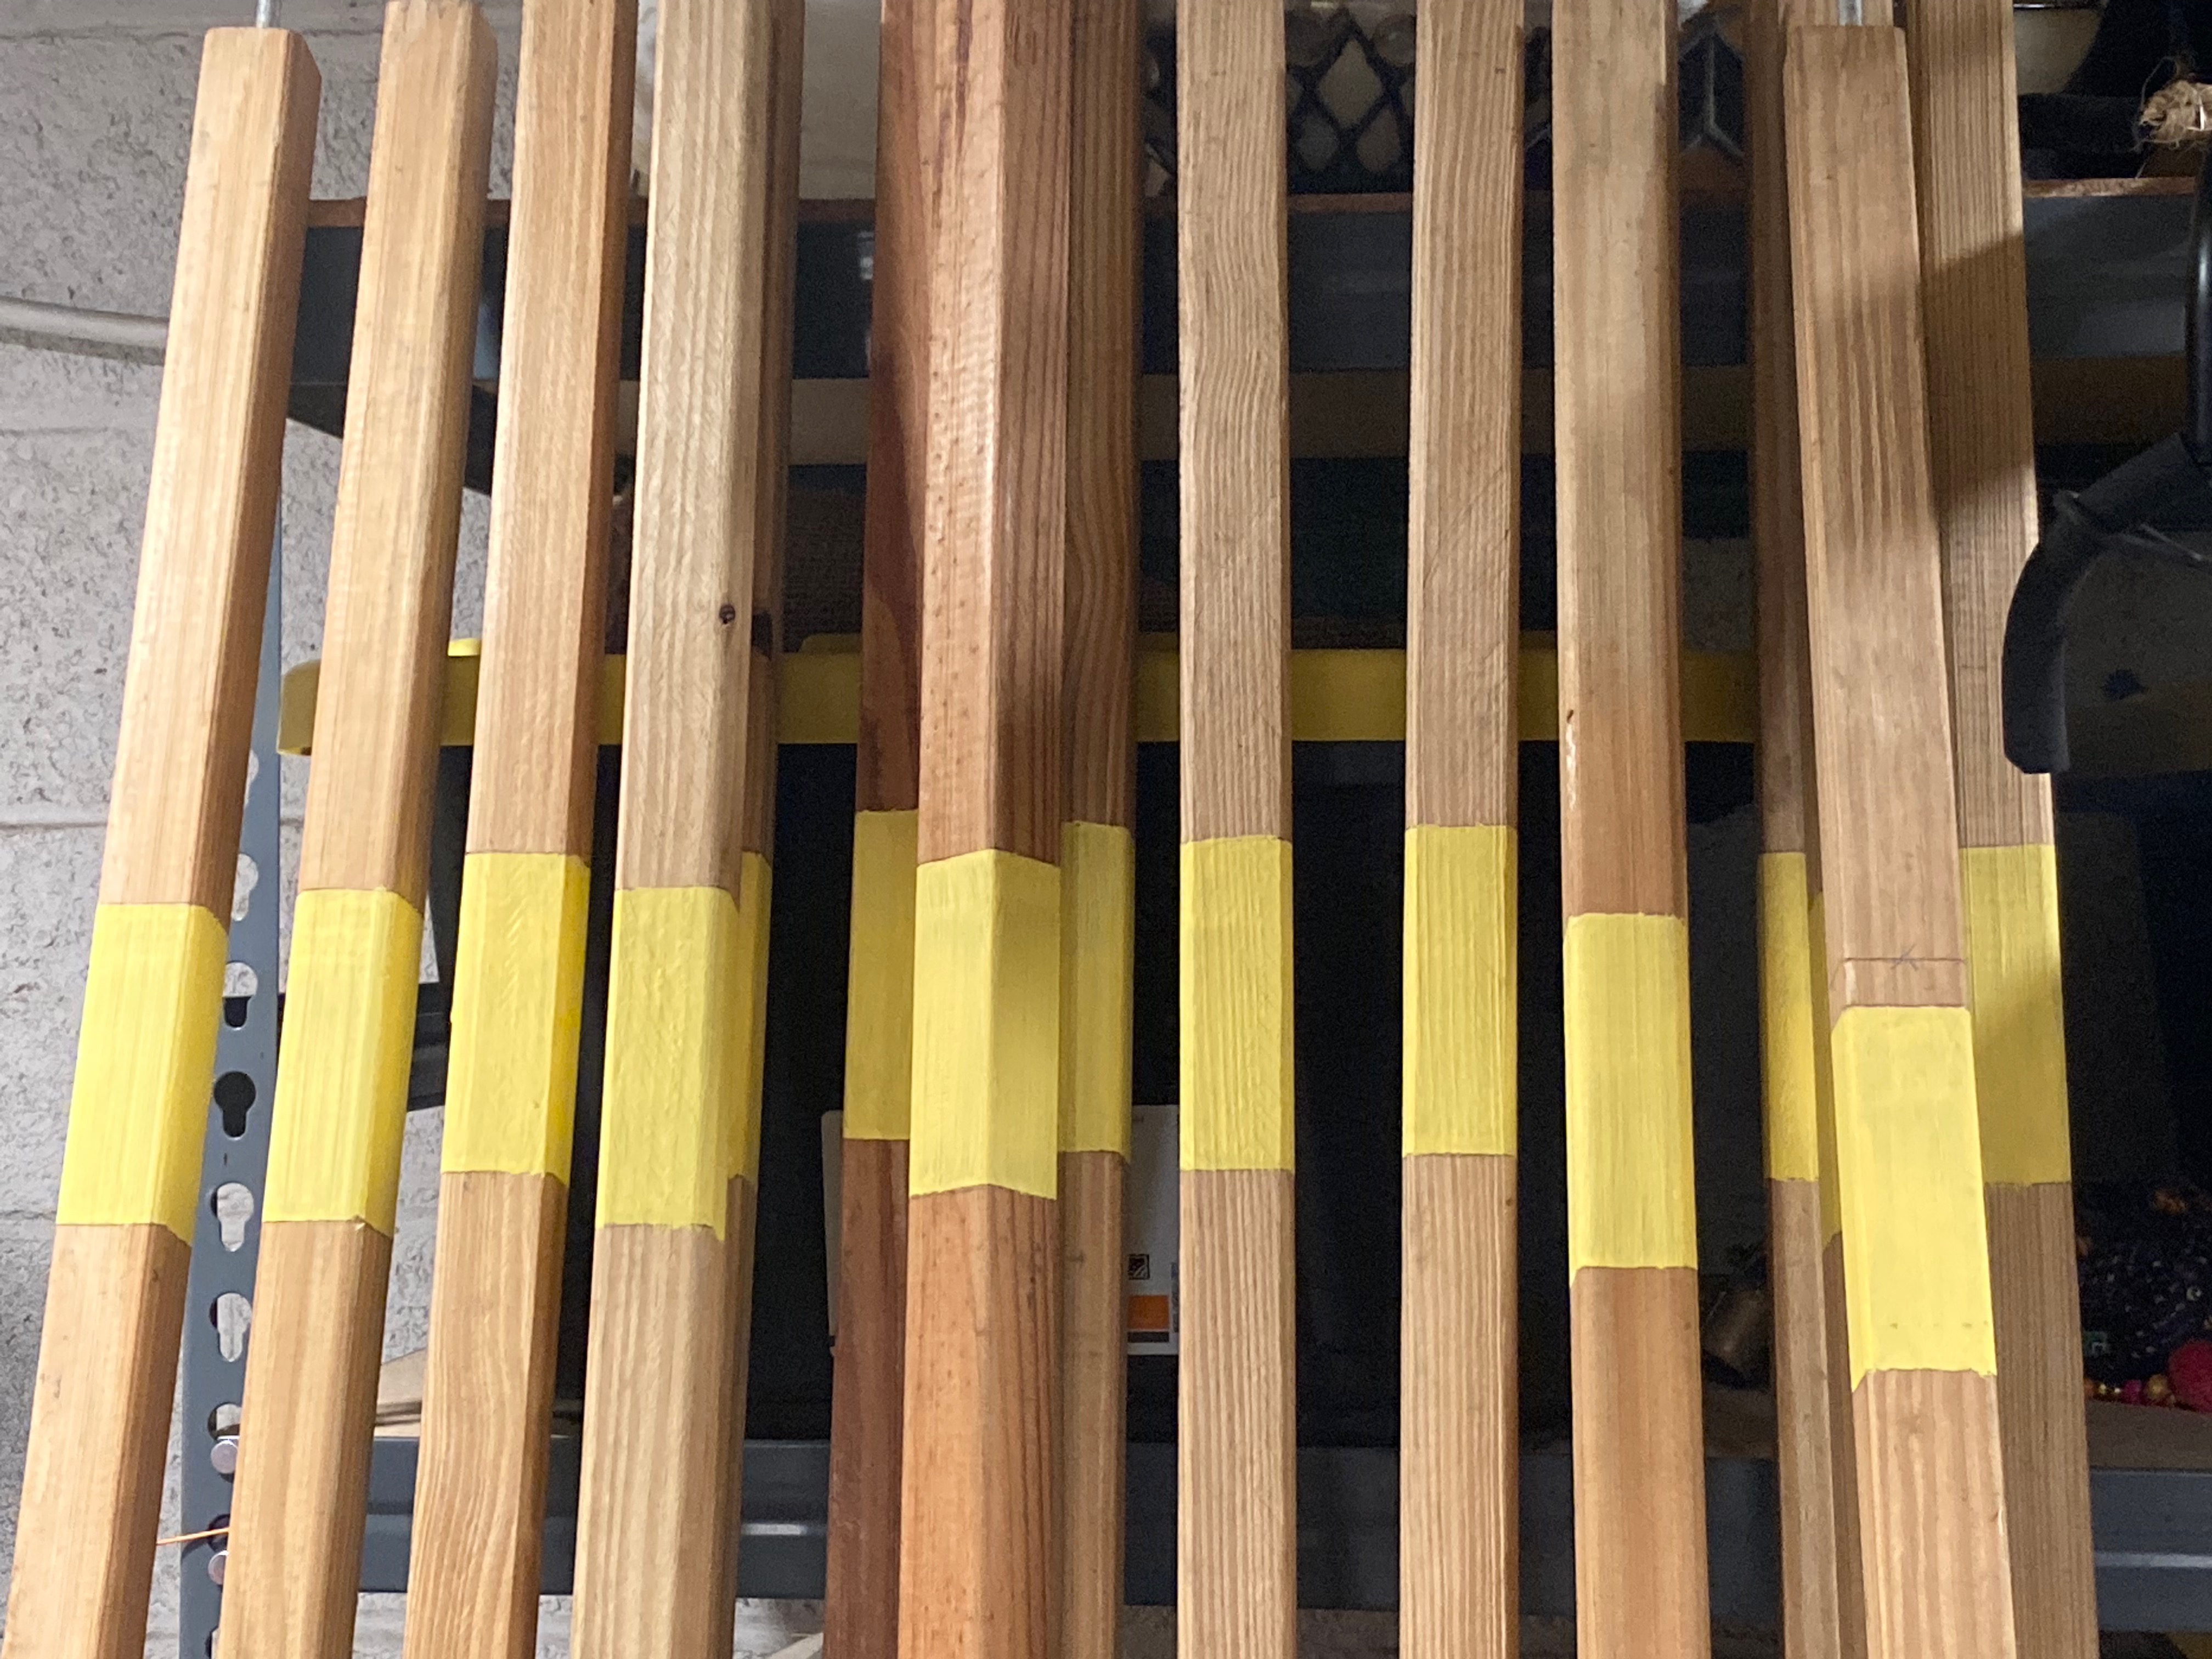
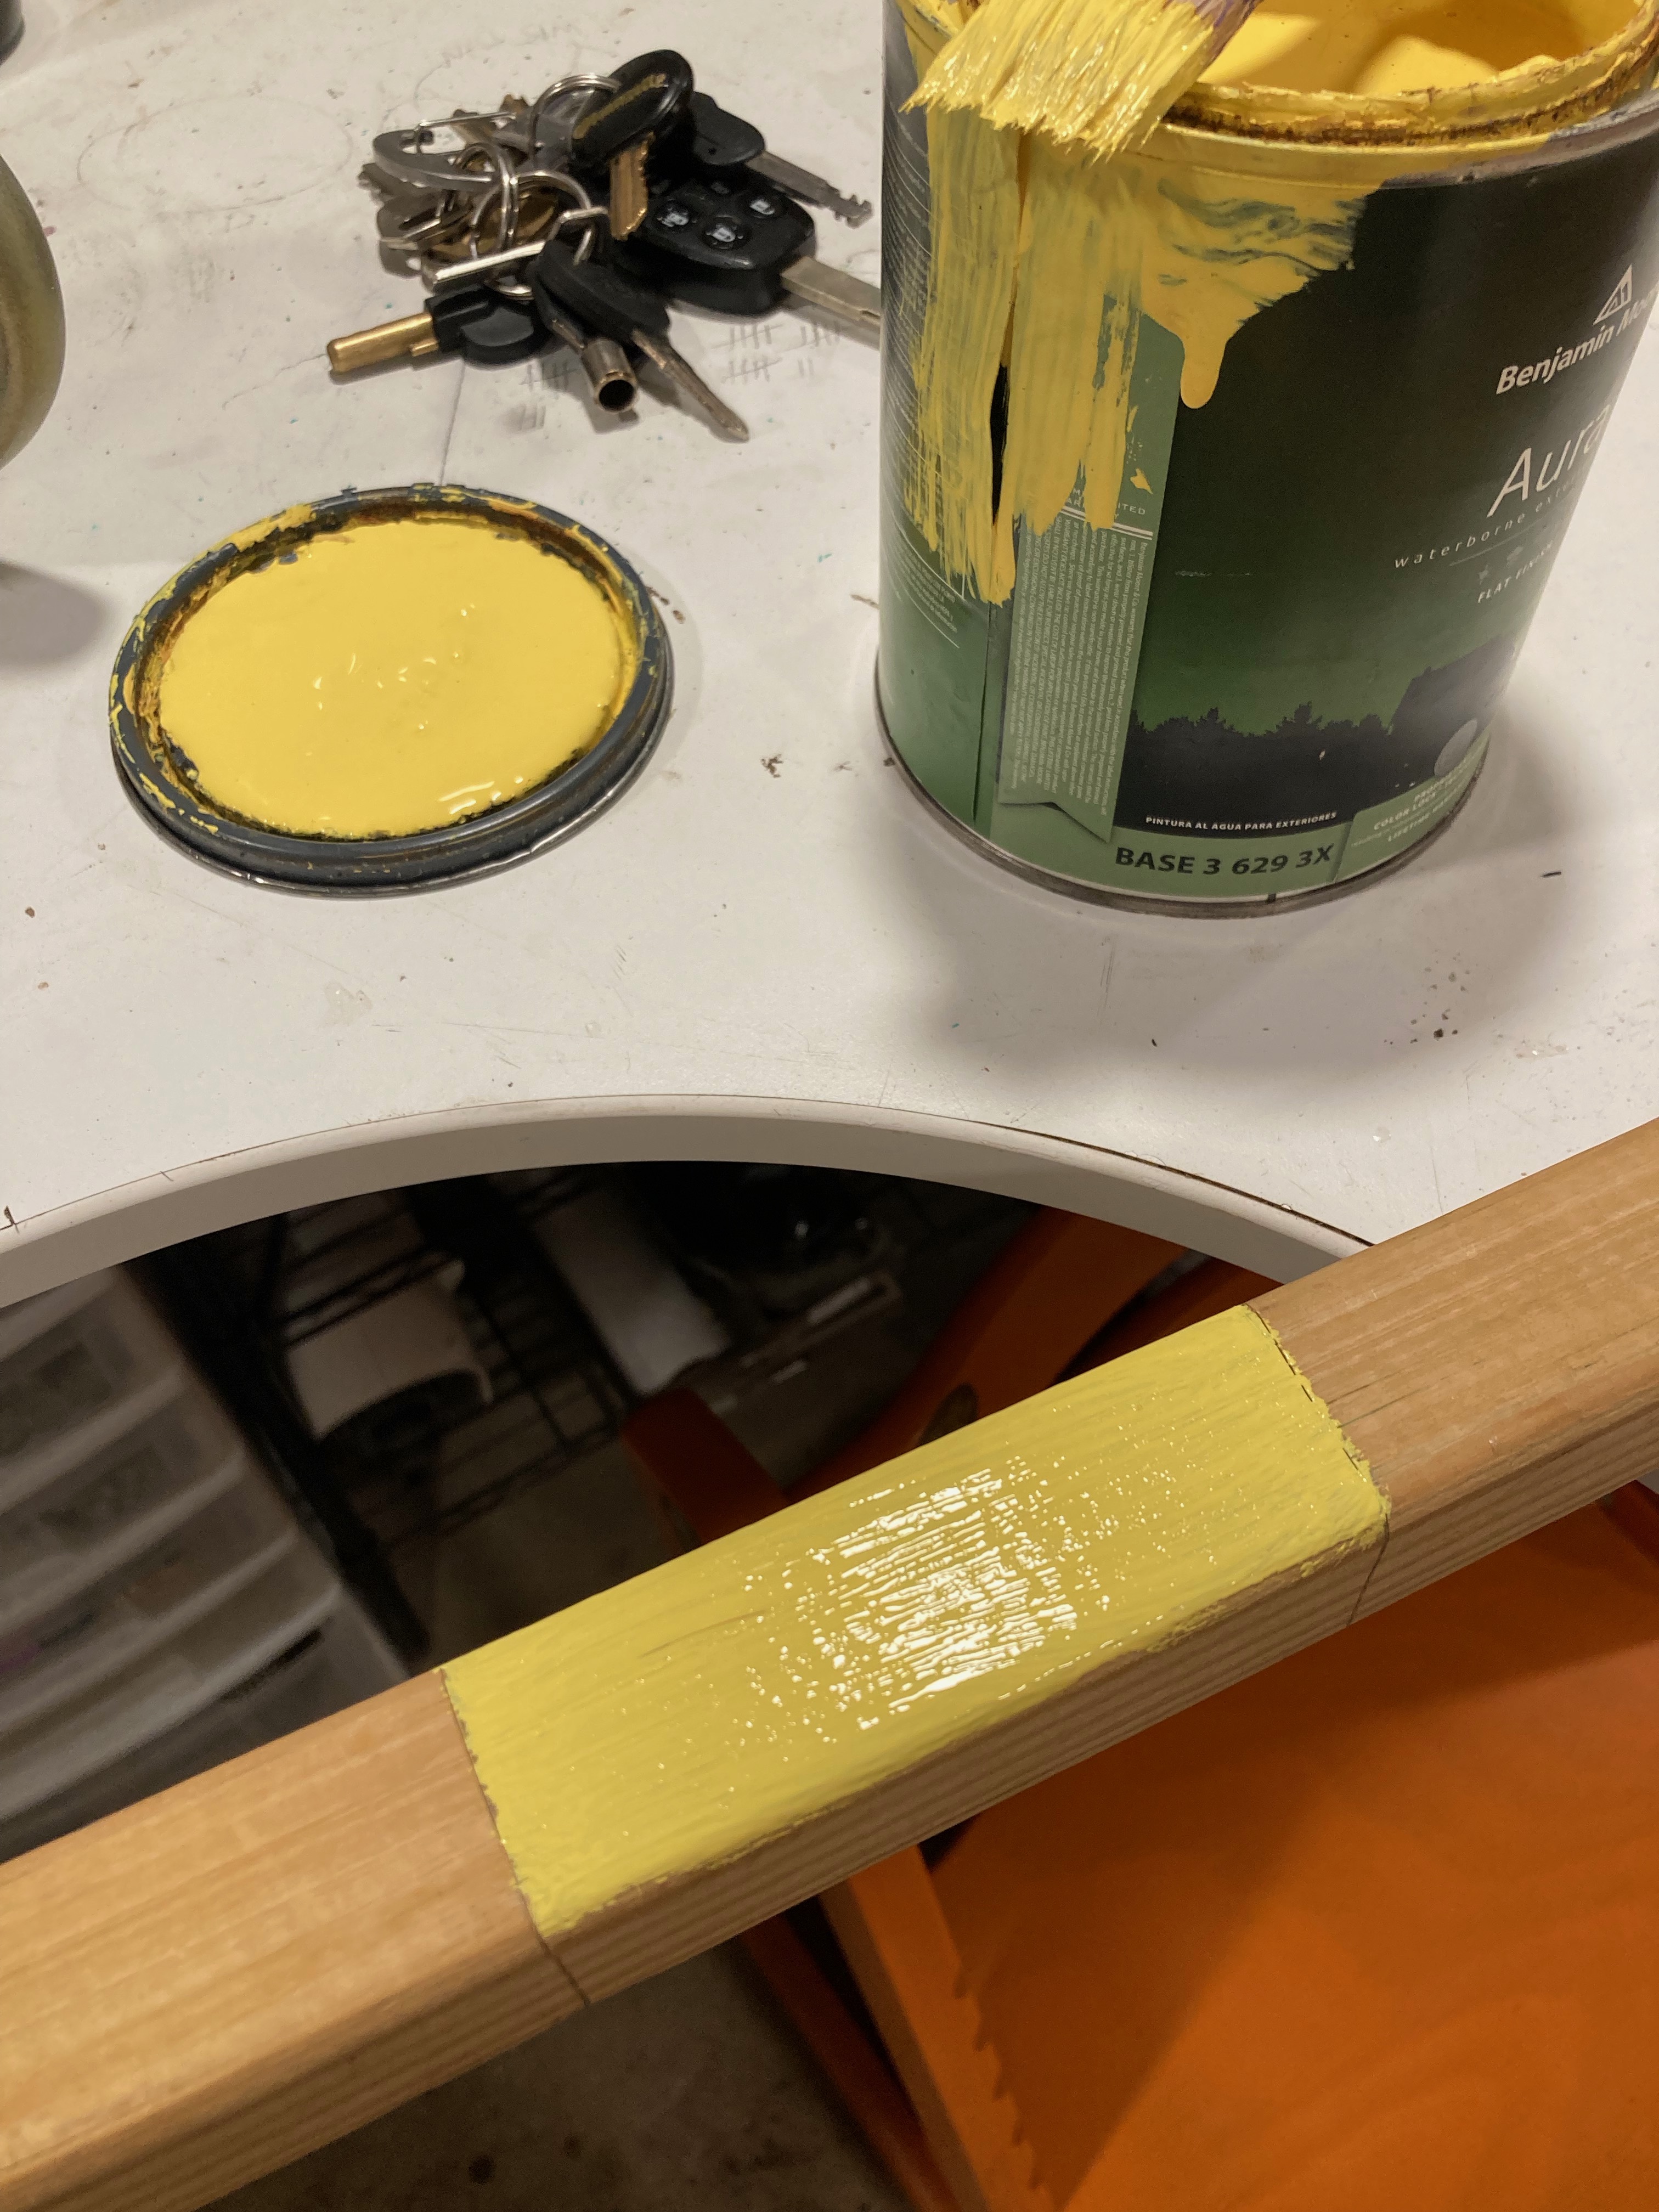
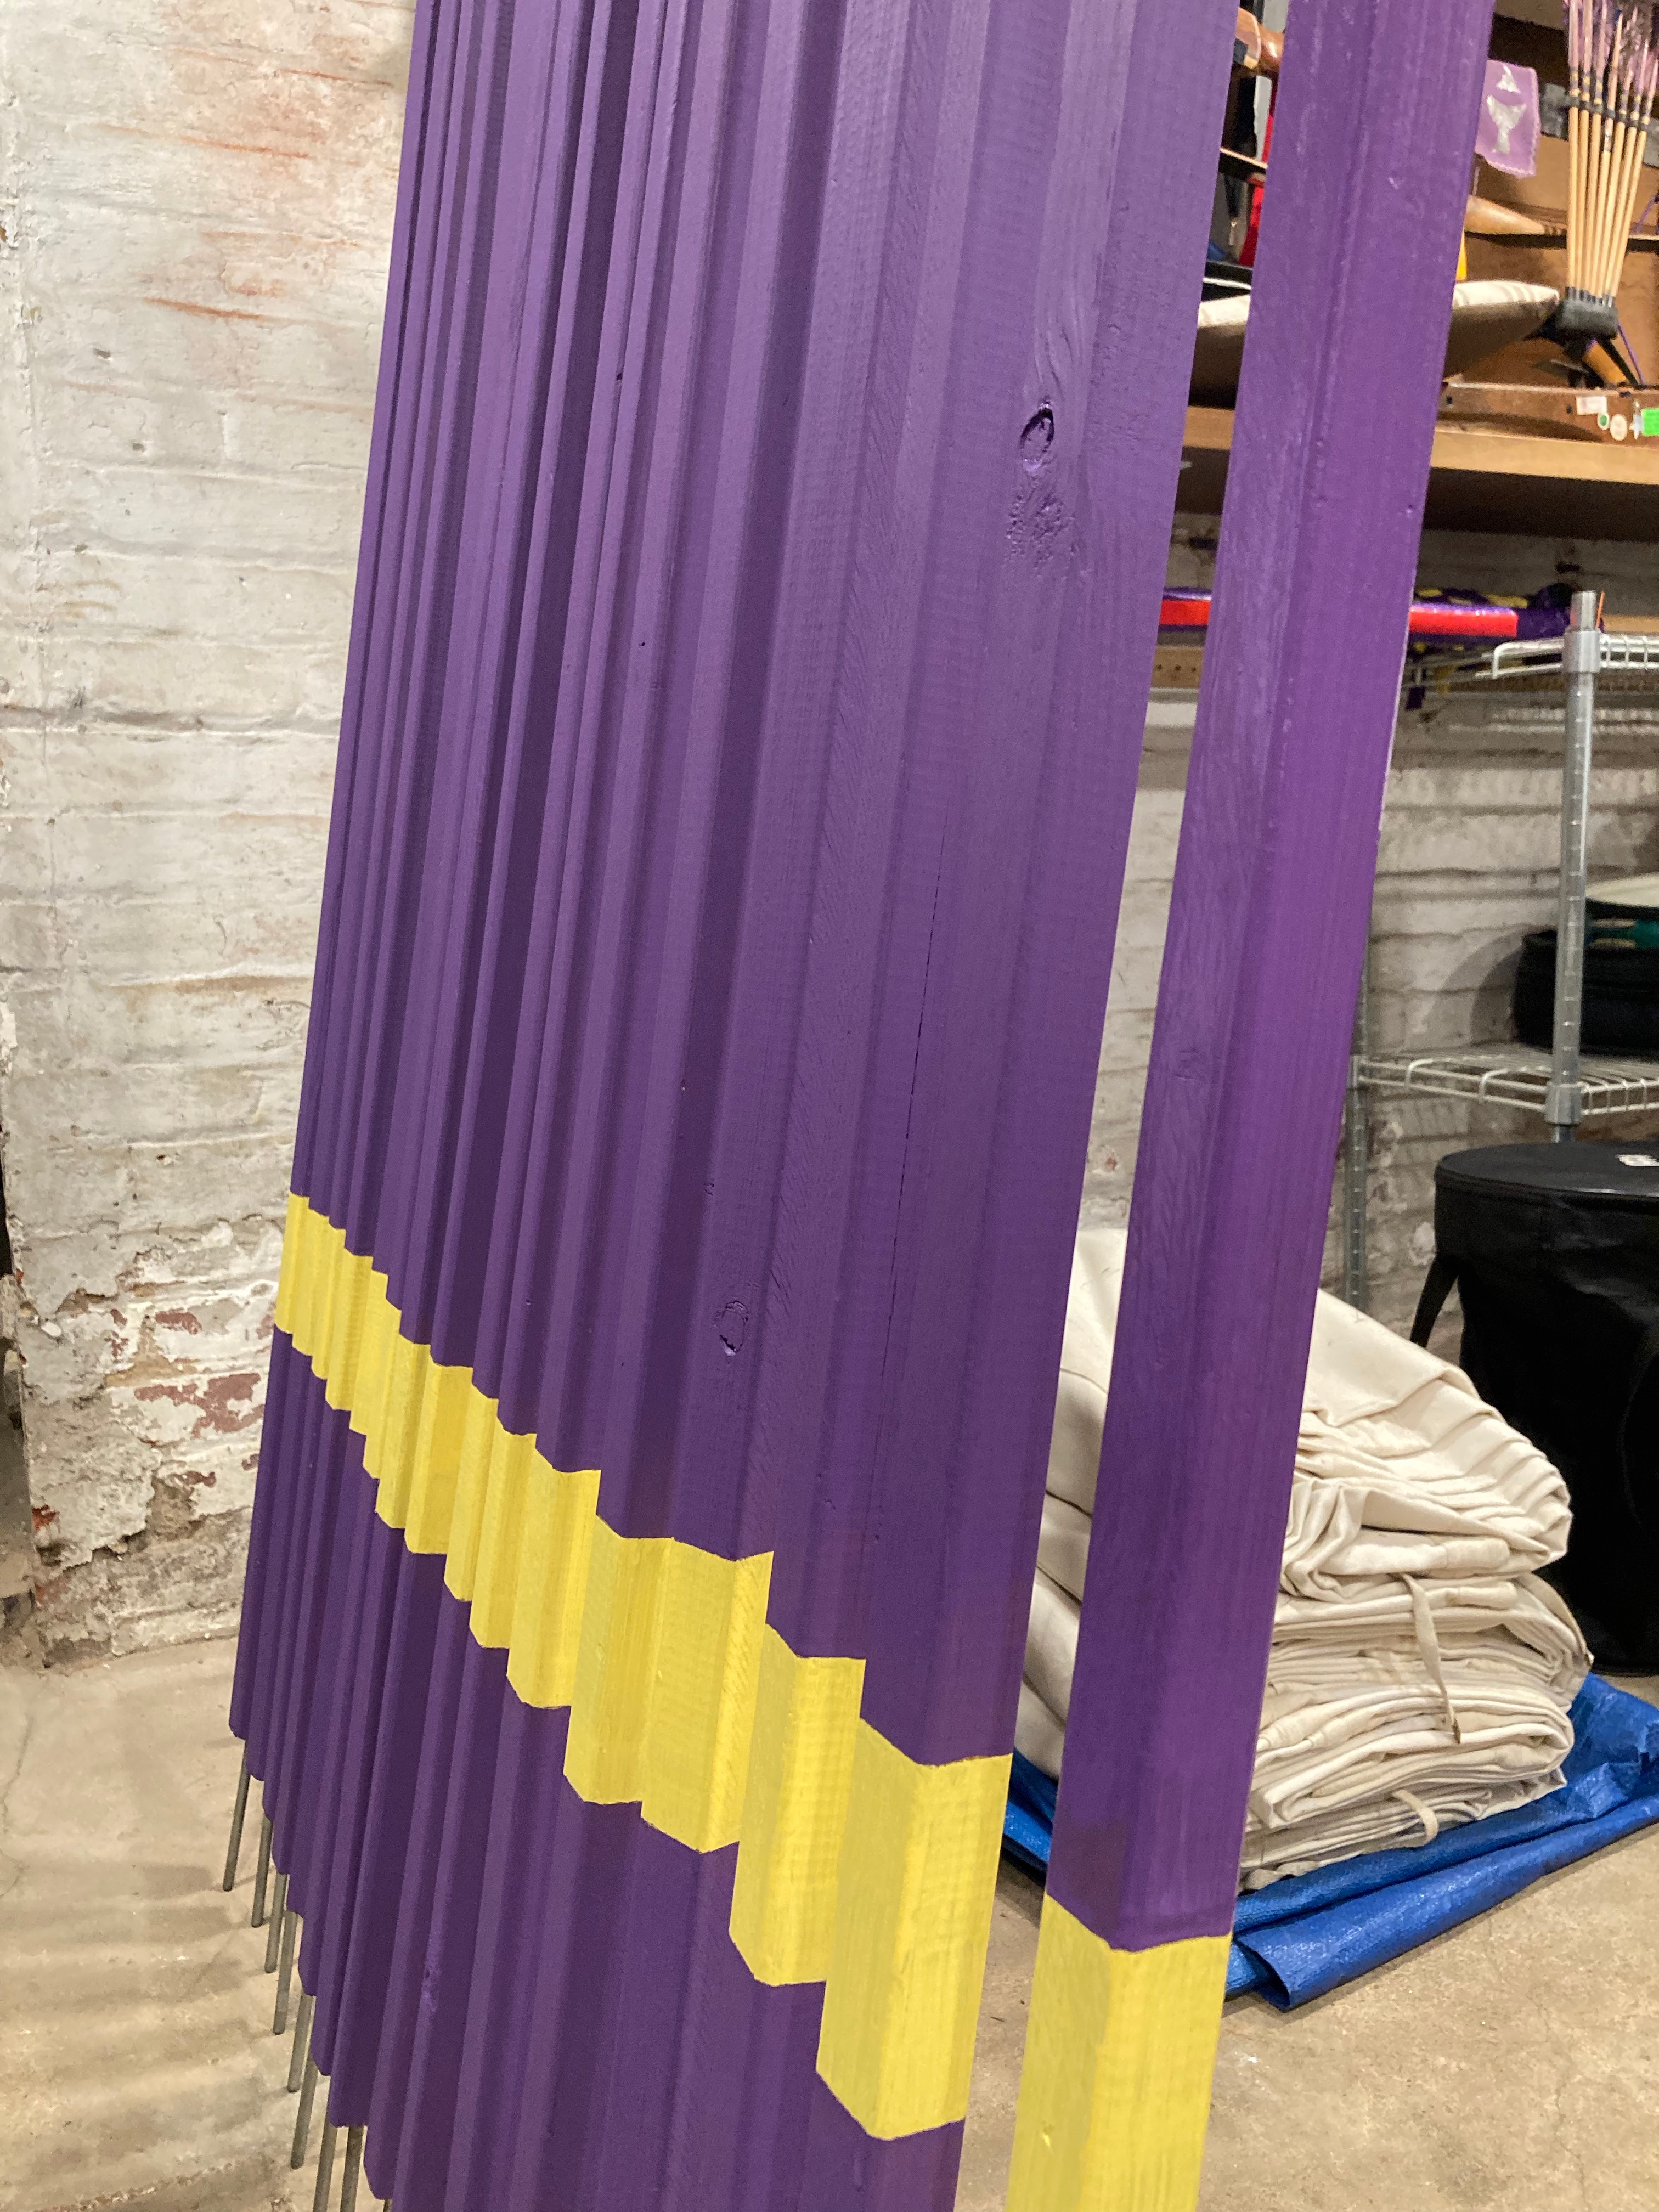
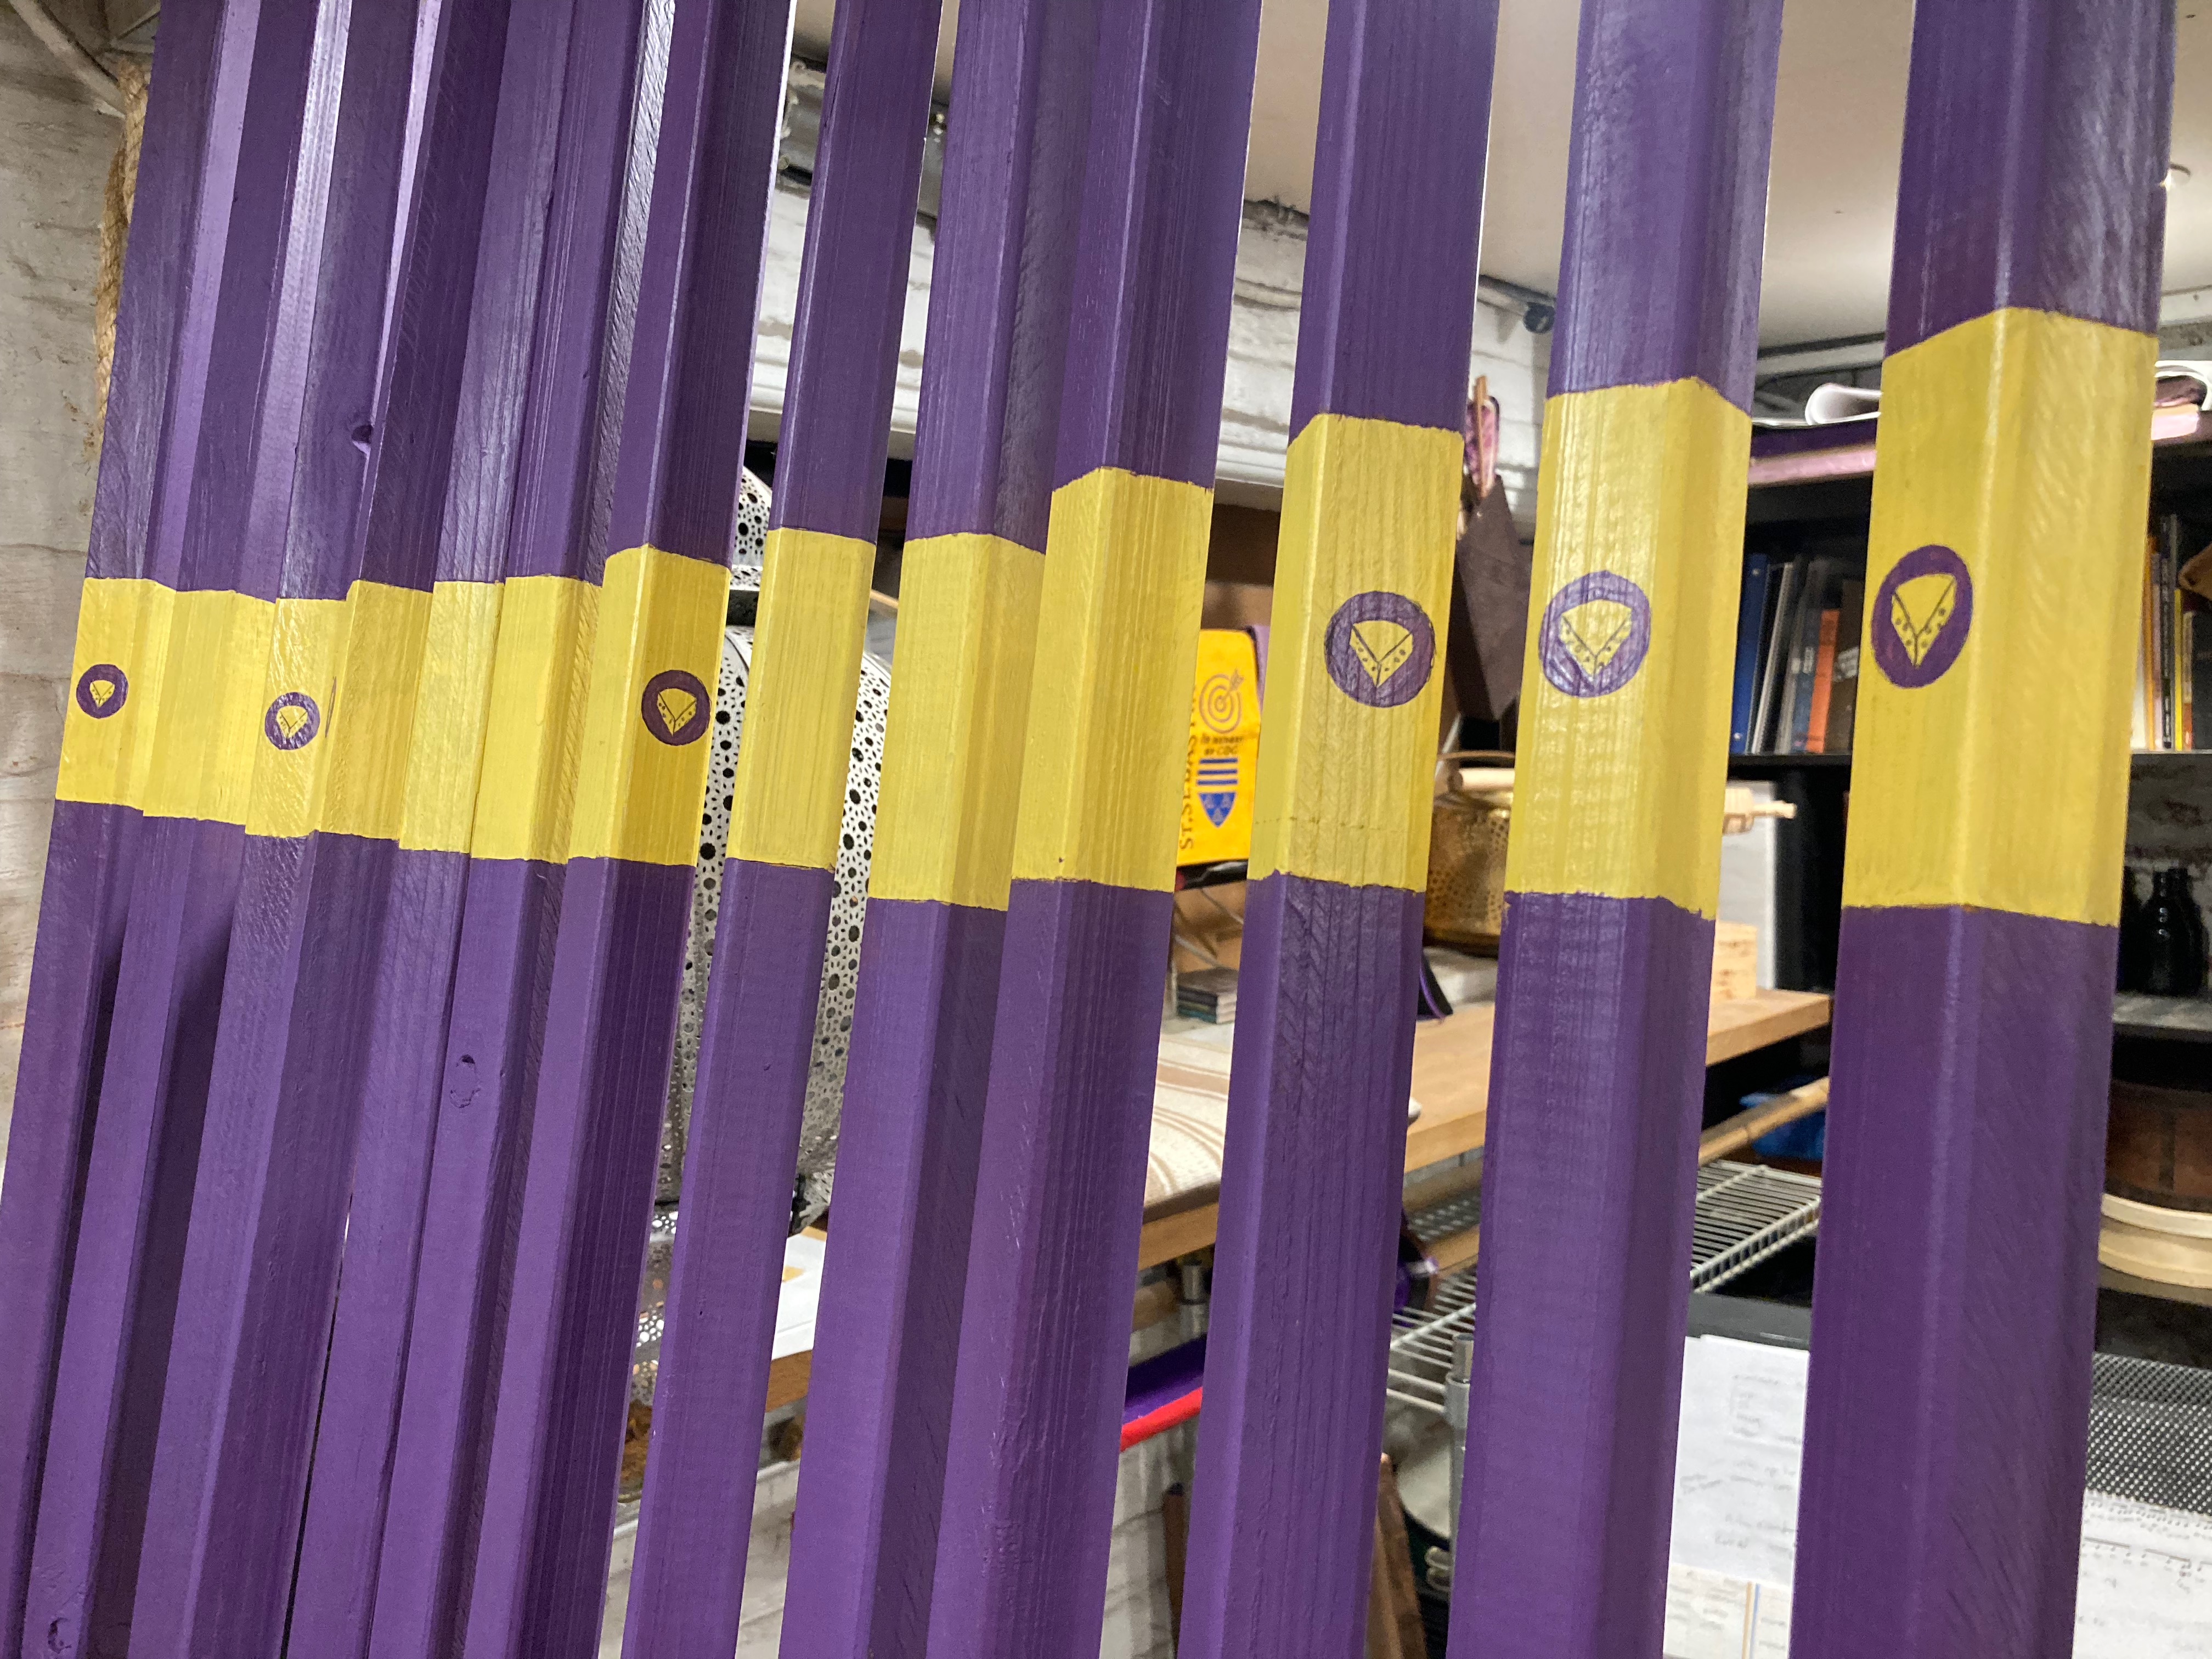
The poles are well over 2 years old, so any warping they might do, it’s been done! If you read the grain and gauge the green-ness of them when purchasing you can reduce the chance of warping. Lightly sanded the them. Measuring out the distances so they are all consistent, made marks with pencils using a drawn reference on a bench. The bans between the two colors I scored with a razor knife to help prevent paint running along the grain. Next applied the paint using one smaller brush to get clean edges.
Let dry…
One by one drawing circles and using a small medium stiff fine brush to paint the purpure circles leaving a void of or for the cheese wedge. Using a black pen, drew in the details of the emmental cheese.
Next is the longest part, two thin coats of marine varnish. A few reasons are to protect other things in the trailer from getting color rubbed off on them, protect the walls of the tent when it is put up, to prevent black marks when stacking and unstacking, and I like smooth things!
Below are the rest of the pics along the path, enjoy!
Greetings friends, if you are like me you like a lil fancy in your life occasionally. I’ve gotten tired of spilling tiki oil and putting away dirty canisters. So when I saw other people with the ‘pillars of flame’ I was intrigued.
For the record, I am not a professional… well, anything. So this is meant to be a guide for a hobby and not intended for strict direction. If you are concerned, seek out a professional for assistance.
Let’s clarify what we are talking about. These are generally vertical poles hooked up to an LP tank. When the top is lit it makes a nice bright fire. Not for warmth mind you, but light.
Constructed well, these give off a tremendous amount of light. However, I’m not necessarily going for lighting up the neighborhood, rather more ‘ambience’. To that end I’ve made modifications that suit my… my… (“idiom sir?”) yes.. idiom! Something like that…
I’m not the first, mind you, to make this kind of adjustment to the basic pillar. There are many fine examples, from adding lava rocks in bowls, or creating patterns with the flames. Here is a version of a tiki torch you can buy from Amazon. These look like they suck fuel worse than a ’65 Ford Mustang.
Im going to walk you through the construction of what I did with some guidance from Brocc Stratton.
1/2″ to 3/8″ fitting to regulator (yours may be different)
1″ nipple
fiddly bits for the top (in my particular case see below)
three couplers
6 washers big enough to fit over pipe
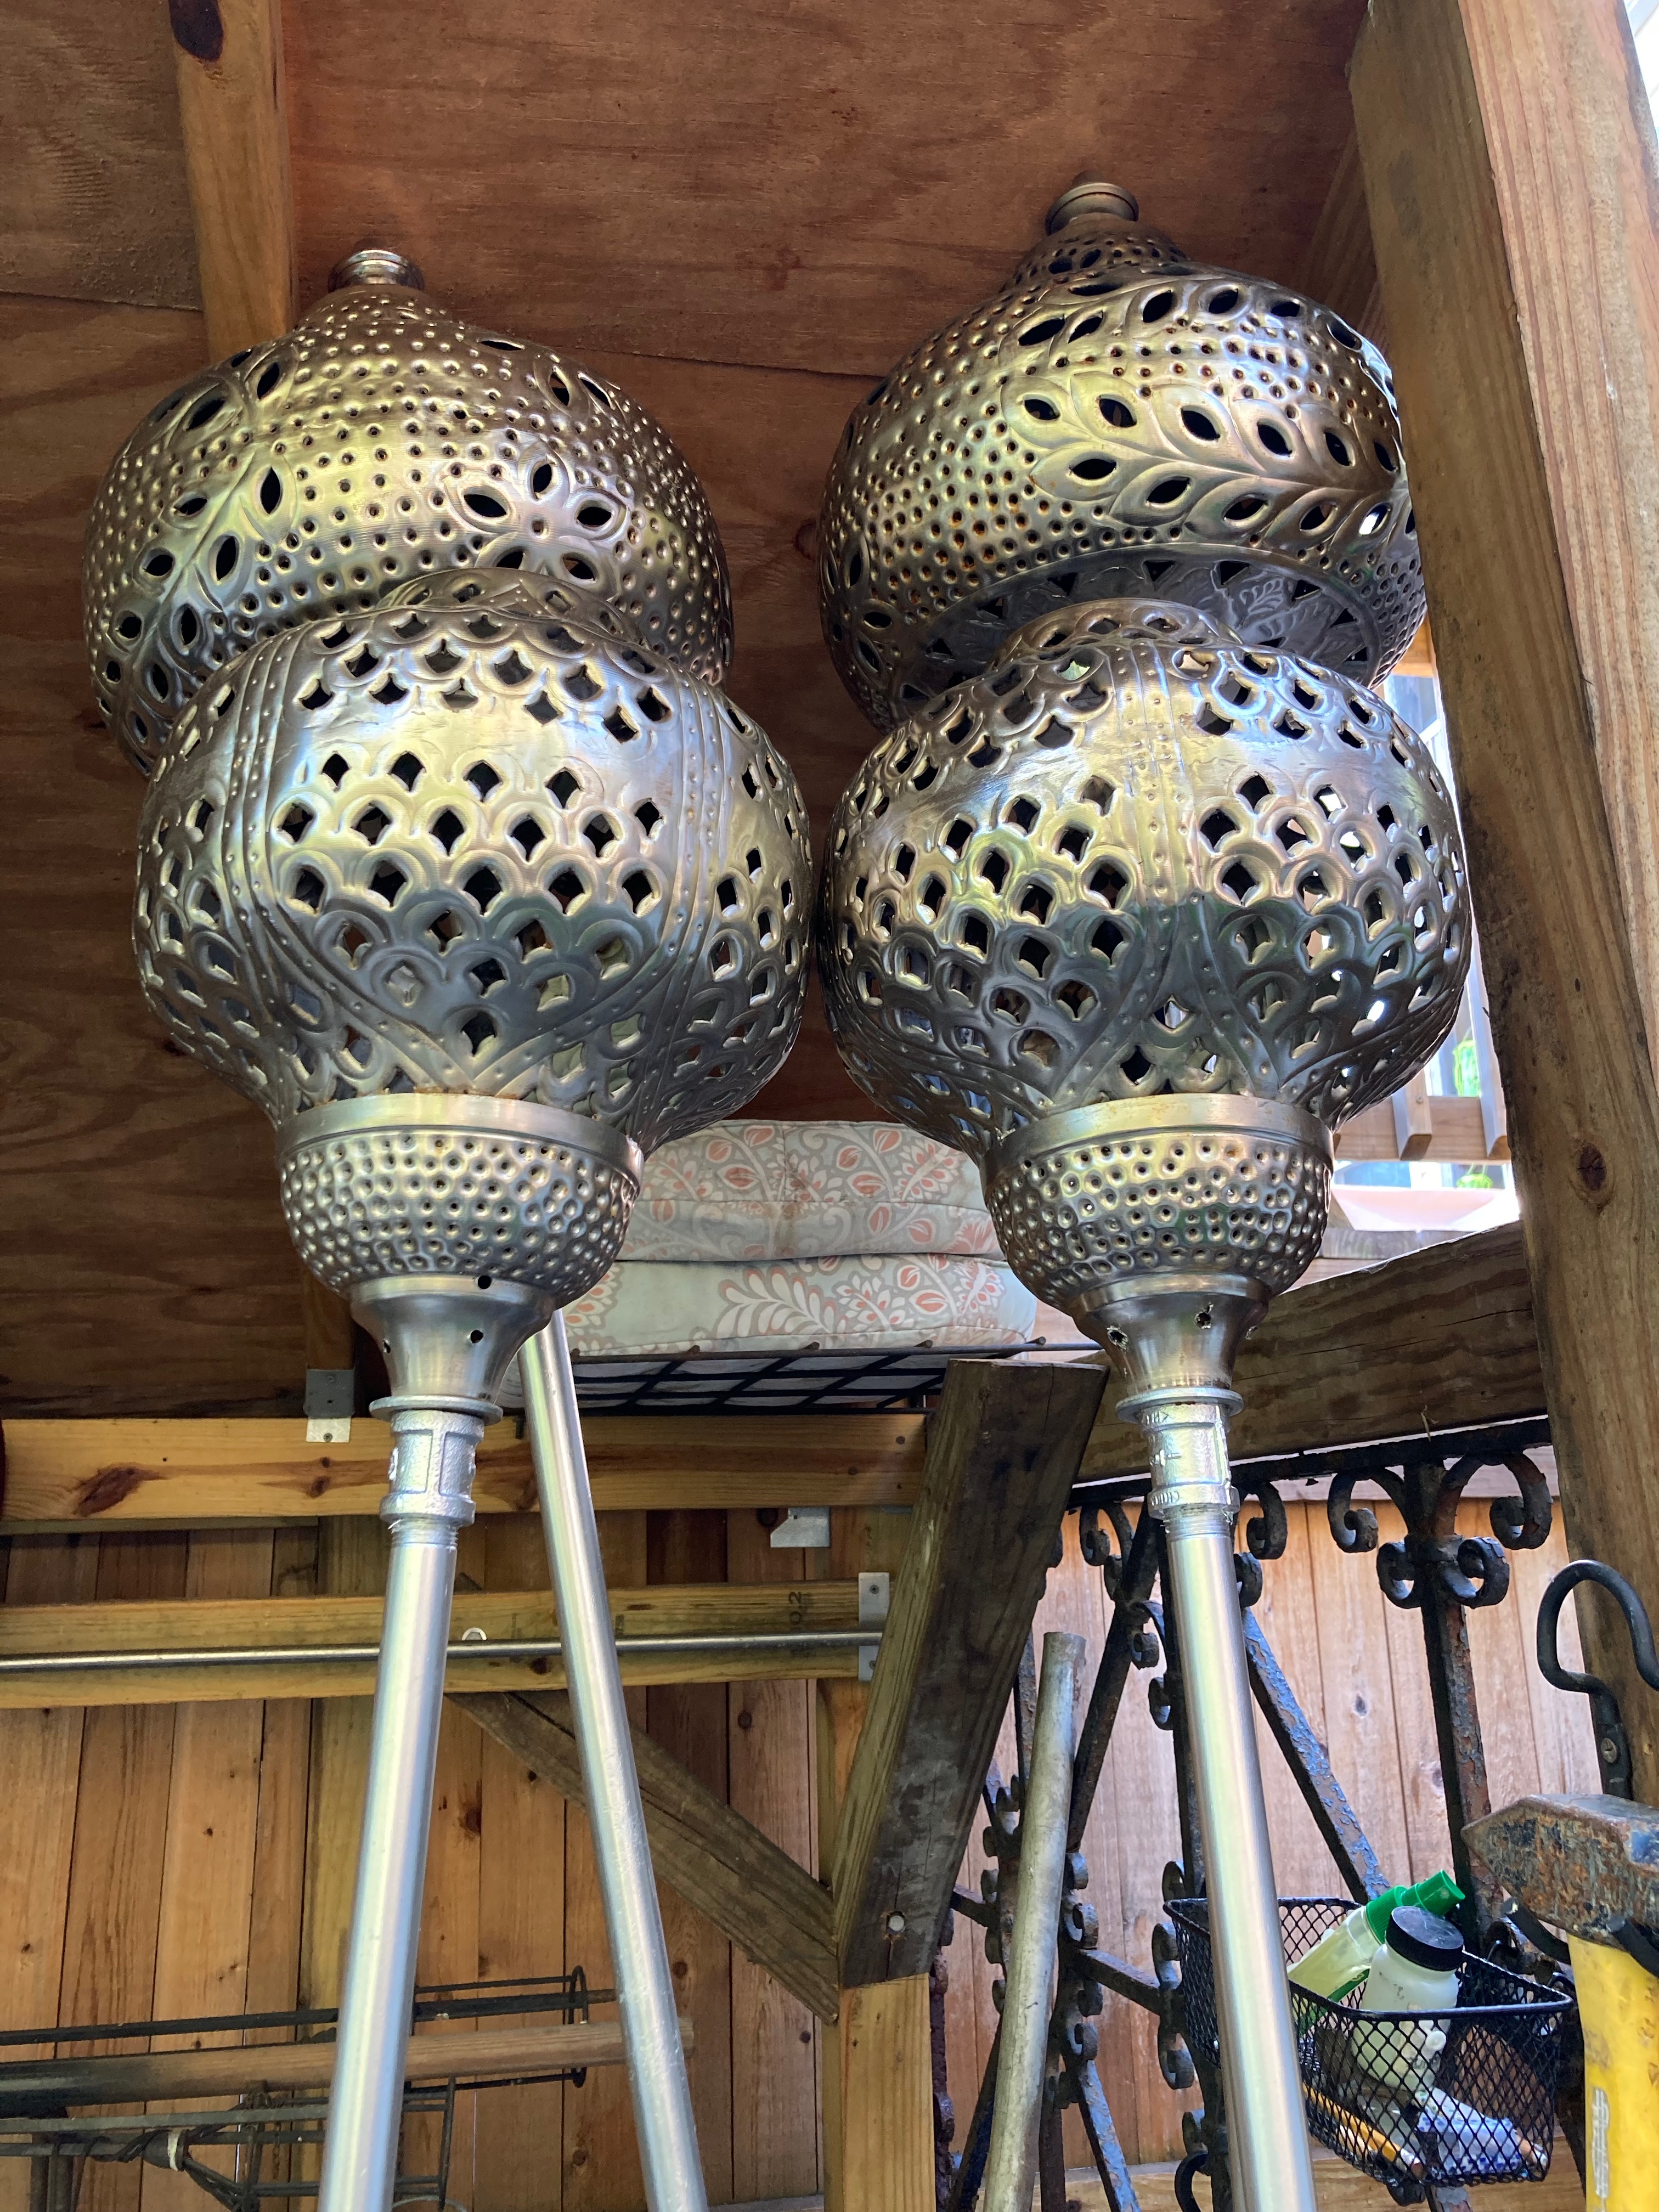
punched metal lamp, bowl, or similar that can take direct flame
make sure you can fit it on to pipe
two 2″ pipe section
Ready? Let’s Goooooo!
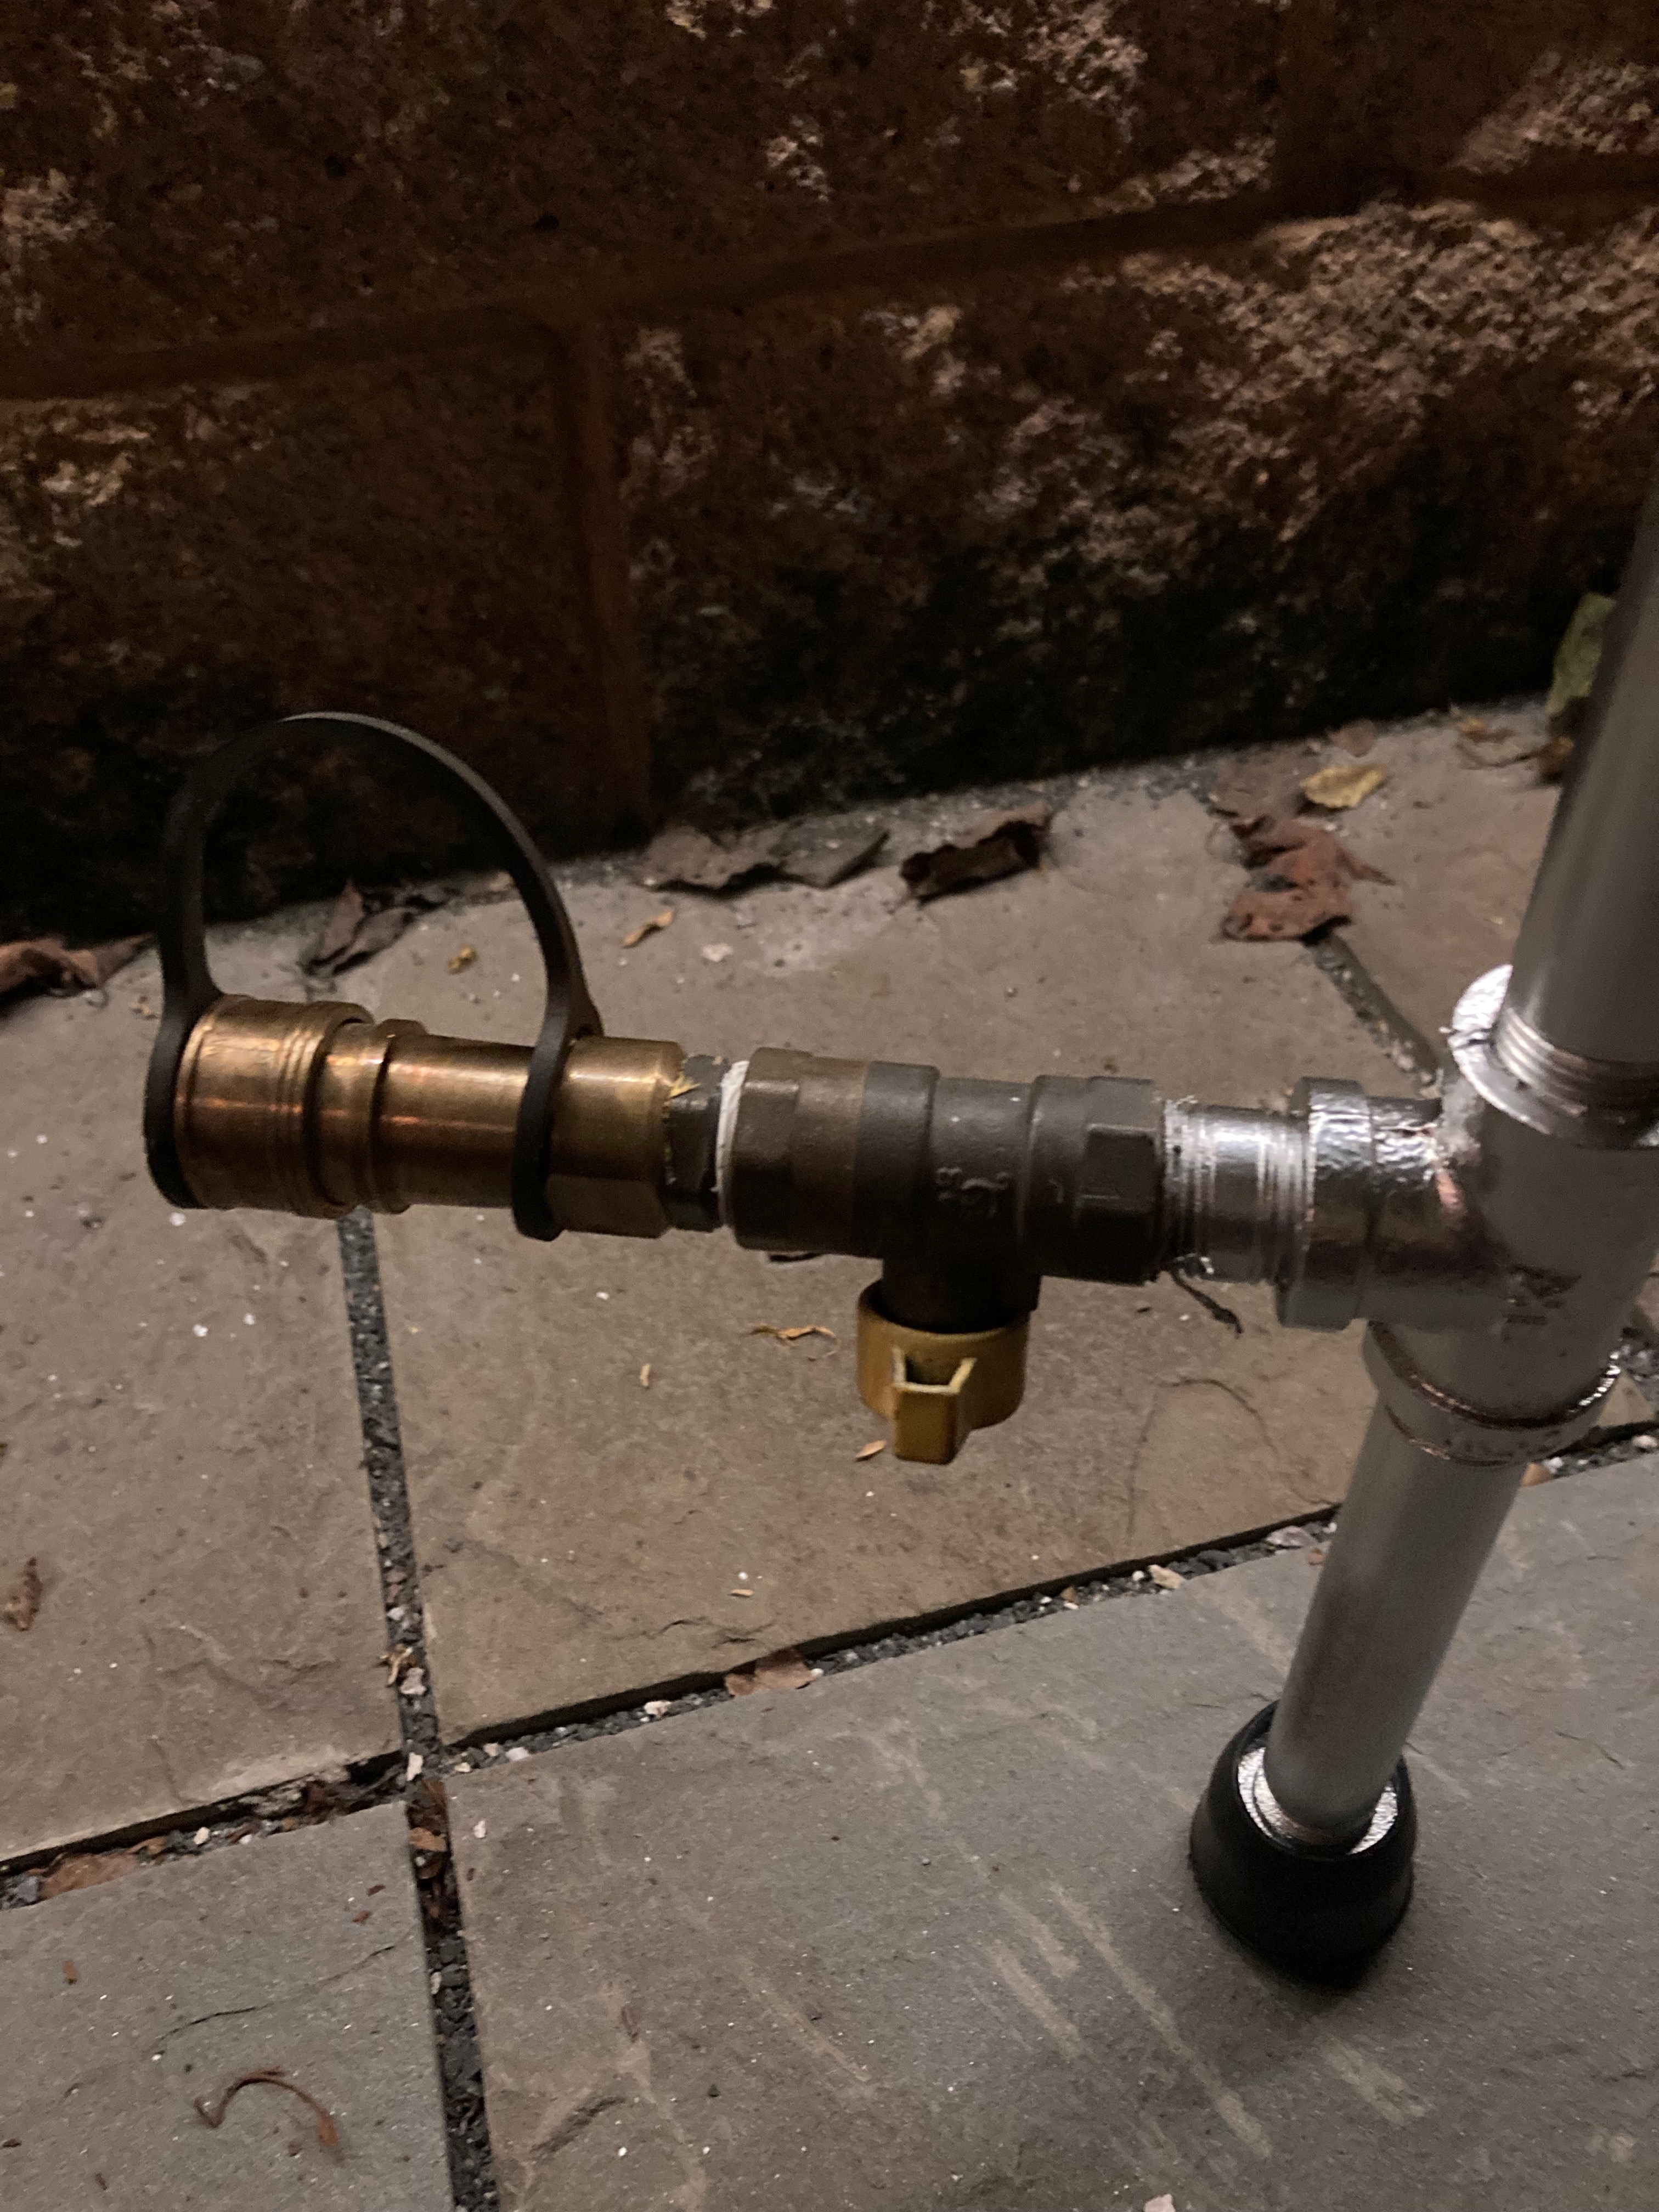
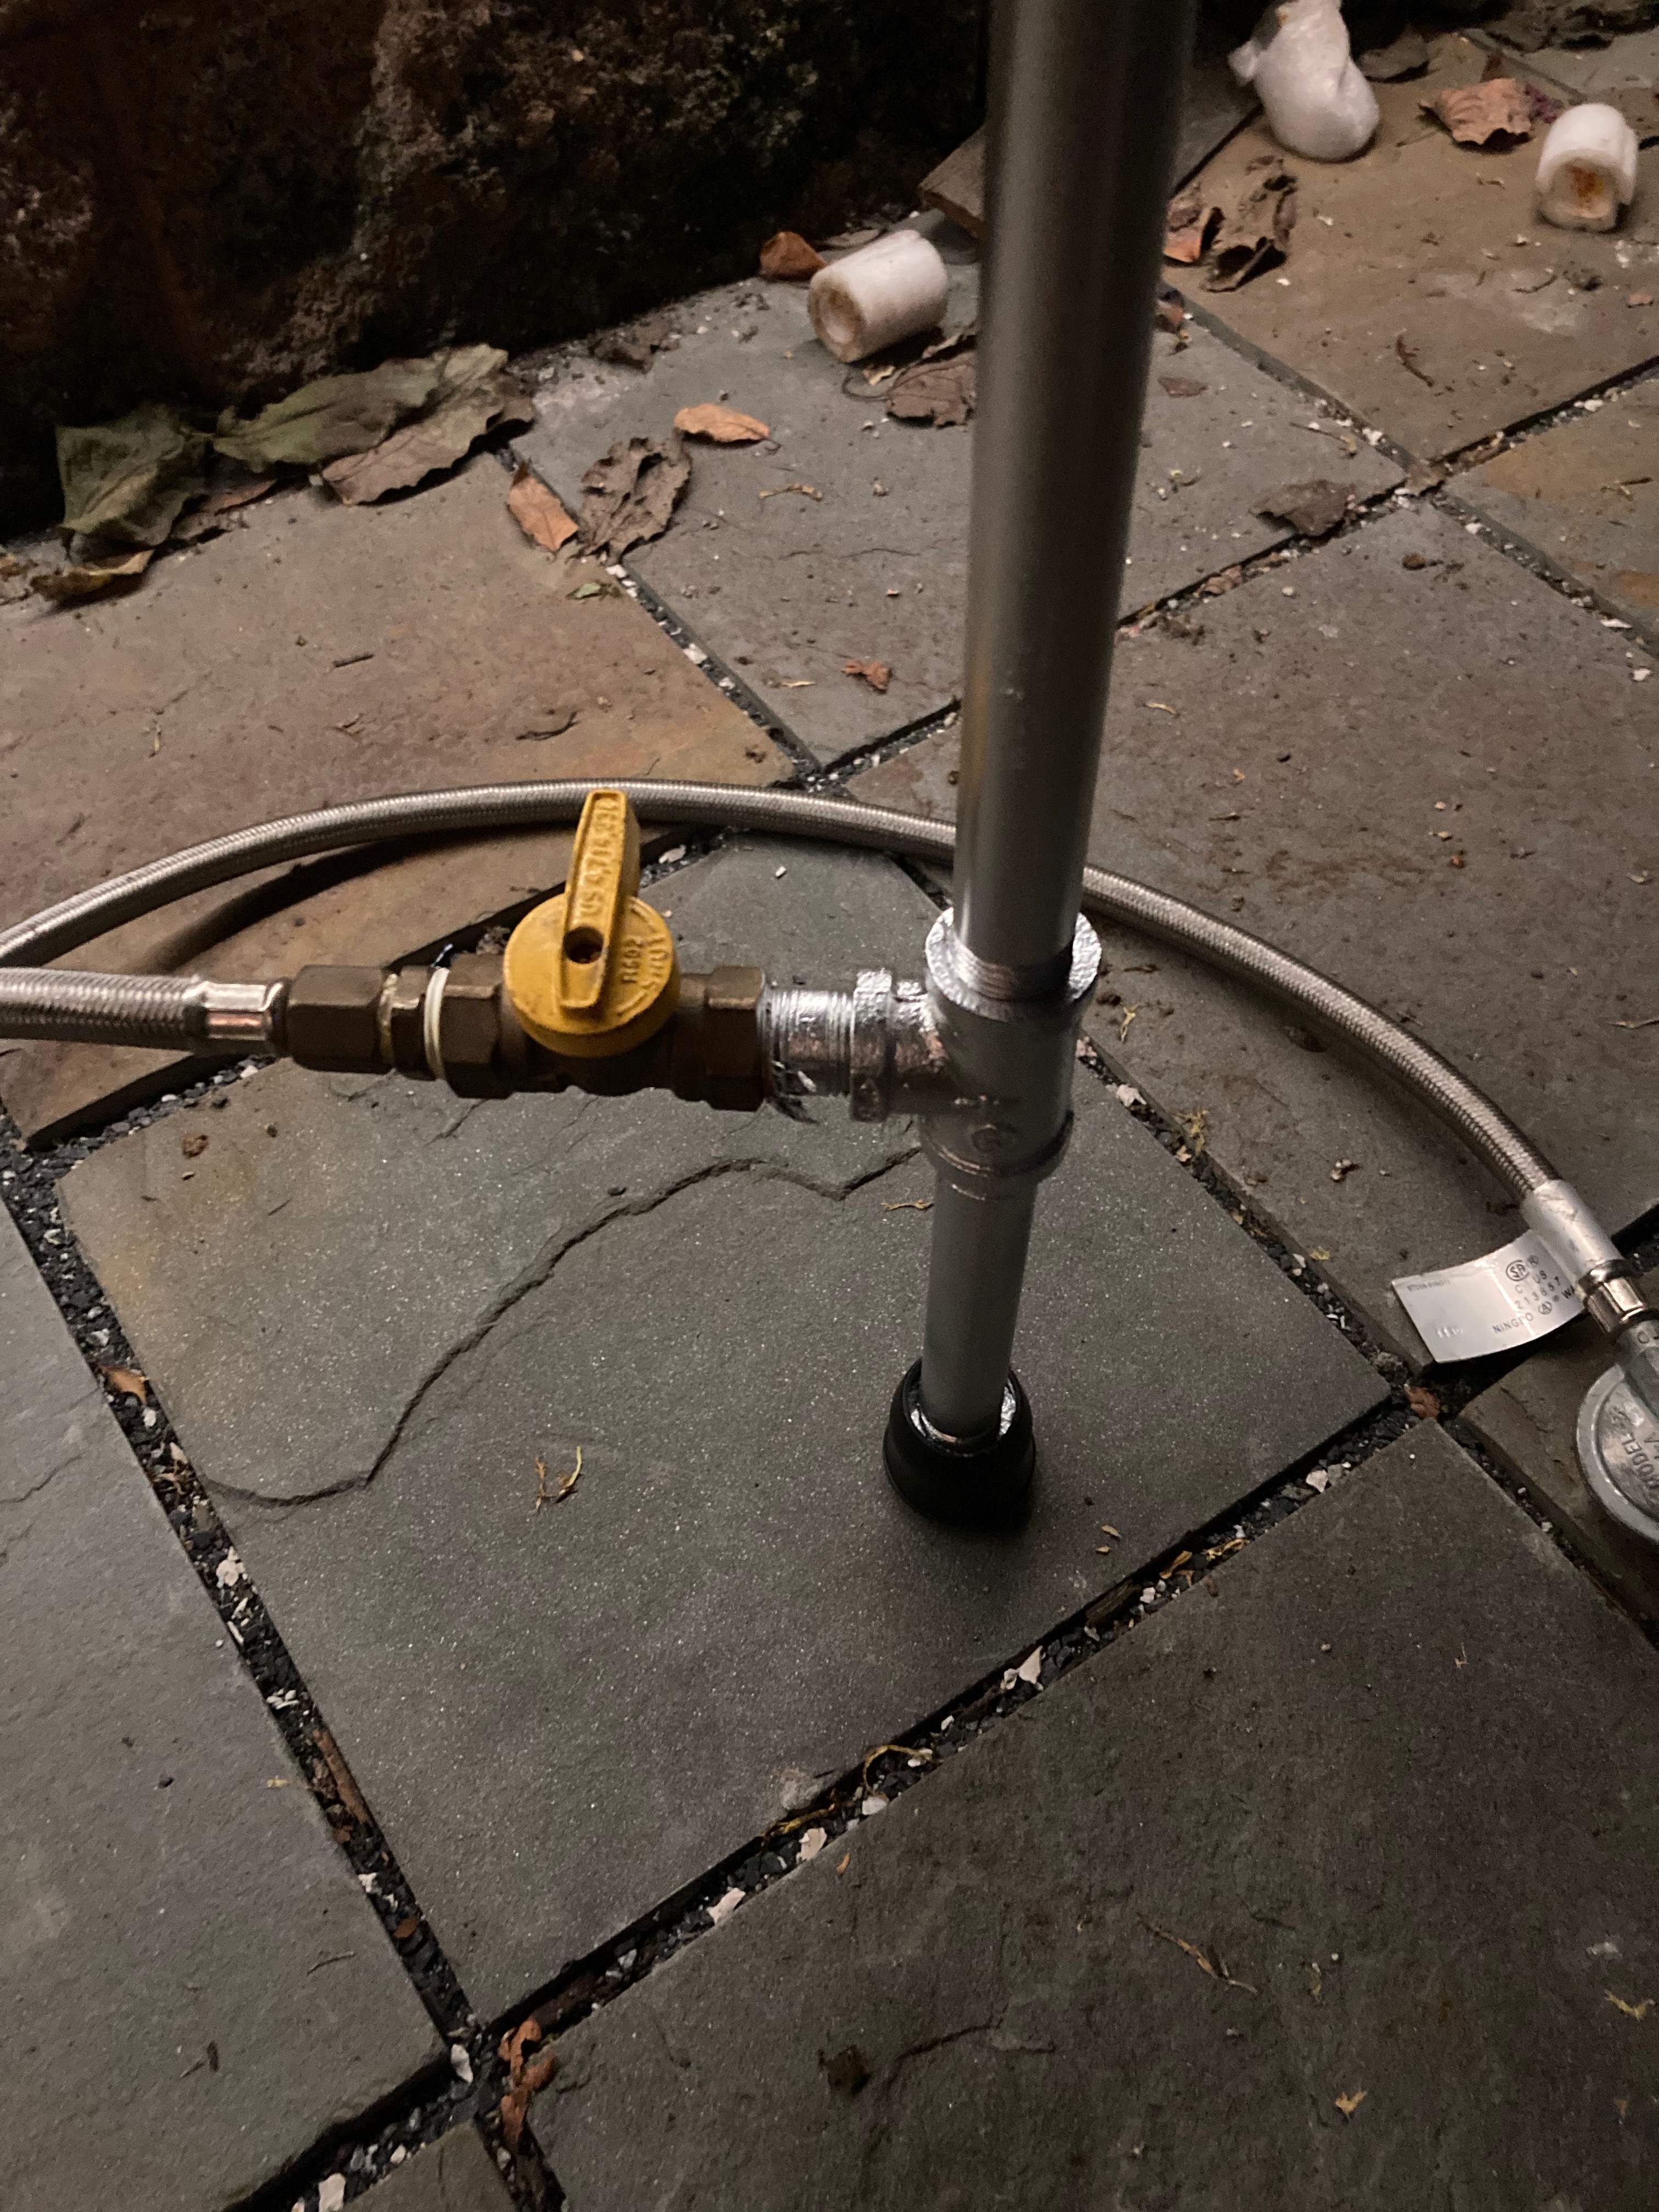
From the bottom up add the tape to the 8″ threads, add a cap to one end, and the ‘T’ vertically. Add tape to the 1″ nipple and connect to the horizontal extended ‘T’, then add the valve.
From here you have two choices, you can directly attach the regulator, or you can add a quick release gas linkage. Something similar to what is pictured here. Not strictly necessary, but if you want to be a little more portable this allows for greater flexibility. From here I added an extension line of 6′ so I can keep the tank further away.
Gas Torch with Quick ConnectorGas Torch with Regulator Connected
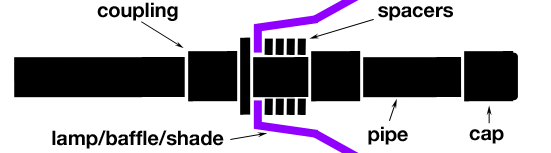
Continuing up we add the length of pipe, again adding the tape anywhere we join the threads. Here is where we add the coupling, as well as the fiddly bits to secure the punched metal, shade, whatever using washers or any other method you can surmise. See illustration below to see how mine are secured.
The smaller section of pipe you use right before the top cap will depend on what you are using as a topper/shade etc… Before adding the shade however, assemble the top pipe and cap. If you have a vice or something, I’d suggest using it for the drilling. I added the cap and used the metal drill bit at 90º and drill holes at 12, 3,6, and 9 o’clock around the side of the cap. Note that the cap will need to be threaded so you can’t go too low, and if you go too high towards the crown, it is solid metal. You will need to fine that ‘sweet spot’.
When adding the lamp top I made a few modifications. A drilled holes near the bottom so water doesn’t pool up. I also used a Dremel to cut a 3/4″ square near the bottom so I can insert a lighter into the chamber to light it.
Tape and mask off the lamp top, and the valve. Any pipe that you don’t want painted. Lightly sand and clean with a rag. I used a self etching primer first, the coated with chrome metal paint. I wouldn’t paint the lamp part of any covering, it can get set alight and now you have another dazzling sight, however unintended.
For funnzies I additionally add rubber furniture feet to the bottom, filled with silicone to protect the bottom cap. The punched lamp toppers I foound as actual electric lamps at two different Marshalls. I disassembled the lamps, created a hole for mounting, and voila!
Lighting the torch:
When lighting the torch, first start by connecting everything up properly. The open the LP tank. You will usually hear a ‘click’. The proceed to open the line valve. I usual open it further than I need until I hear a gas ‘hiss’ then reduce to 1/4 maximum. Count to 10, then use a long lighter, in my case, inserted into the hole and hold near each of the pin holes in the cap. Sometimes they will light each other up depending.
Conclusion:
There is a LOT more I can say here, but I have a drink to finish and more projects to set up! Post any questions below!
When preparing for an event as a Target Archery Marshal, I always seem to forget something. Even when I’m acting as Combat Archery Marshal, but thats for another day!
I was recently teaching a class when it struck me that we, as marshals, always brag about all the junk we have in our kits, but don’t really share this info with the world at large. Let’s be honest, nobody wants to hear a marshal drone about their bow scales, am I right?
But in this situation, I am going to do just that! Im going to lay out what I have in my kit, what is and isn’t essential, and what might be good to have! Now, be prepared… my list assumes space. I have a trailer so this is easier for me, your mileage may vary. Keep in mind this list does not relate to Society/Kingdom law, its my personal kit, and rules!
Here goes!
essential
item
yes
Paper and pencils – for sign in, notes, scores, etc
yes
stickers – for inspections, etc
no
gloves – every good worker has ’em
yes
hammer and stakes – those range lines wont hold themselves
yes
50′ – 100′ measuring tape – we need to measure distances
yes
twine or natural string – marking lanes, lines
no
bow stringer – variety if possible
no
loaner gear* – gloves, bows, etc
no
ground quivers – plant stakes, tubes, etc
maybe
day shade
maybe
IKCAC target and gear
yes
Royal Round targets
maybe
ground targets
yes
prizes for shoots **
yes
range rules – physical or electronic
no
atl atl target – whether FITA or hay bails
yes
appropriate space for the shoot
definitely
positive mental attitude and willingness to help
This is pretty off the cuff, if you have suggestions, please leave a comment!
* Now, loaner gear I think is a whole additional post, there is quite a lot to discuss there.
** this is a completely separate topic as well
#FiveMinuteFilk Pennsic Inspired by Karin Tayler de Cameron Virtual Pennsic where people are camping in their backyard.
Here comes the rain again
Falling on my tent like a tragedy
Streaming down the walls like a dew explosion
The canvas sways in the open breeze,
The roof leakes like others do,
Trying to sleep while Im soaking,
Is it rain or morning dew
Serengetti clouds on me
This fog is new
Bog mist on me
My soaking shoes
My head is killing me
As pressure looms
Here comes the rain again
Falling on my tent like a tradgedy
Streaming down the walls like a dew explosion
Oh
I want to breathe no humidity
I want it dry like deserts do
I want to get out of this ocean
Is it raining on you
So babies cry like me
Diapers full of poo
Here comes the rain again
Falling on my tent like a tradgedy
Streaming down the walls like a dew explosion
(Here is comes again, here it comes again, oh no)
I want to breathe no humidity
I want it dry like deserts do
I want to get out of this ocean
Is it raining on you
Ooh here comes again
Here comes the rain again
Dripping on my head like a melody
Falling on my head causing rage emotion (ooh ooh yeah)
I want to walk in a warm dry wind
To be dry like sponges do
The furthest thing from an ocean
Oh rain, just eff you
Here comes the rain again
Falling on my tent like a tragedy
Streaming down the walls like a dew explosion